
Today, I want to install and learn SAS Studio from my Data Science Server running Linux.
While there are many alternatives to learn, and due to, being a Masters Student of Data Science from the City University of New York School of Professional Studies (CUNY SPS); I found out that SAS® offers a University Edition version, in which we pay nothing and we can gain everything!
Previously, I wrote an article on How to Install & Run CUNY Virtual Desktop; this guide, helped to get access to one of the three flavors of SAS, the flavor presented is more of a barebone approach, and in order to solve that, I have found out that SAS has a better interface called SAS Studio that helps tremendously with the desired functionality.
What is SAS® University Edition
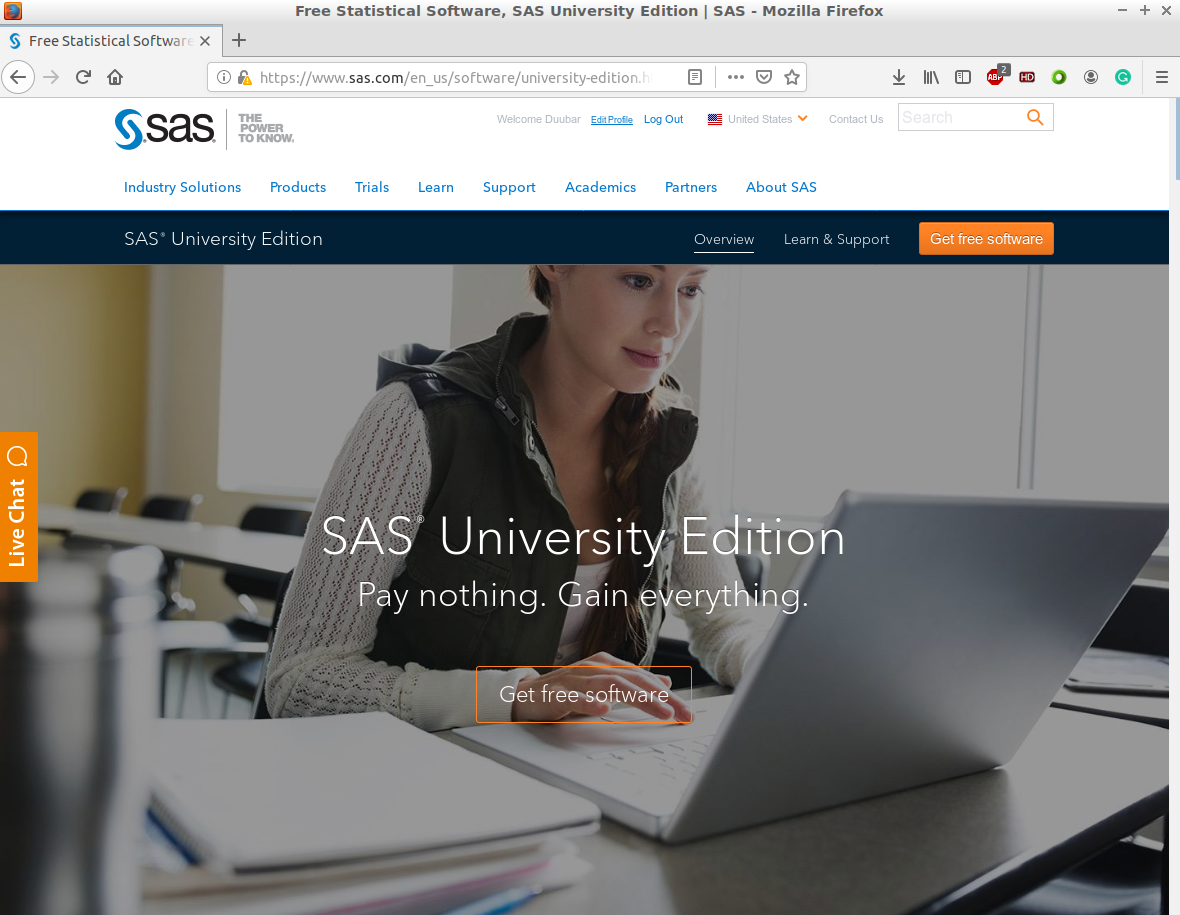
As described on their site, SAS® University Edition is a free SAS® software for academic, non-commercial use. An interactive, online community. Superior training and documentation. Moreover, the analytical skills that we need to secure our future.
For more info, visit https://www.sas.com/en_us/software/university-edition.html.
How to install SAS® University Edition in Linux
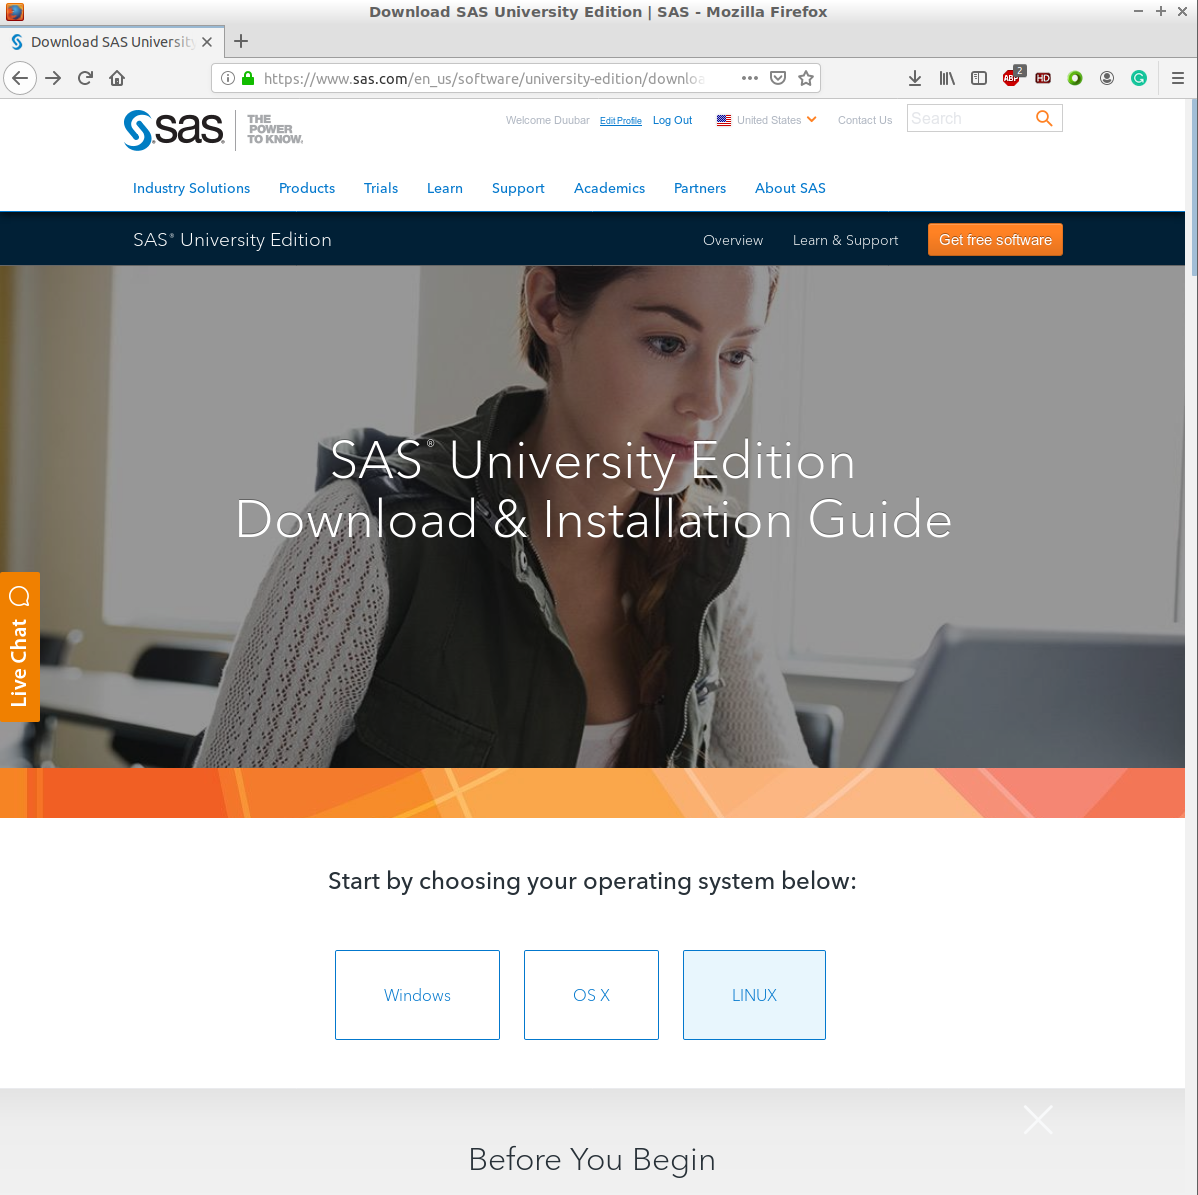
To install, you can follow their guide as given on their website, or you can follow my step by step guide for further enhancements.
You can find their instructions here: https://www.sas.com/en_us/software/university-edition/download-software.html#linux.
Before You Begin
To ensure a trouble-free installation, make sure your Linux computer meets the minimum system requirements:
Linux operating system:
- x86-64 hardware.
- Minimum 1GB RAM.
One of these browsers:
- Mozilla Firefox 21 or later.
- Google Chrome 27 or later.
Installation and Configuration Process for SAS Studio Basic
The basic edition of SAS Studio supports Windows and UNIX operating environments. Unlike the enterprise edition, installing the basic version does not require a deployment plan. However, before you can install the SAS Studio Basic edition, you must complete several prerequisite steps, such as selecting the directory for SASHome and the SAS Software Depot. To install SAS Studio Basic, use the SAS installer account.
Step 1: Install VirtualBox
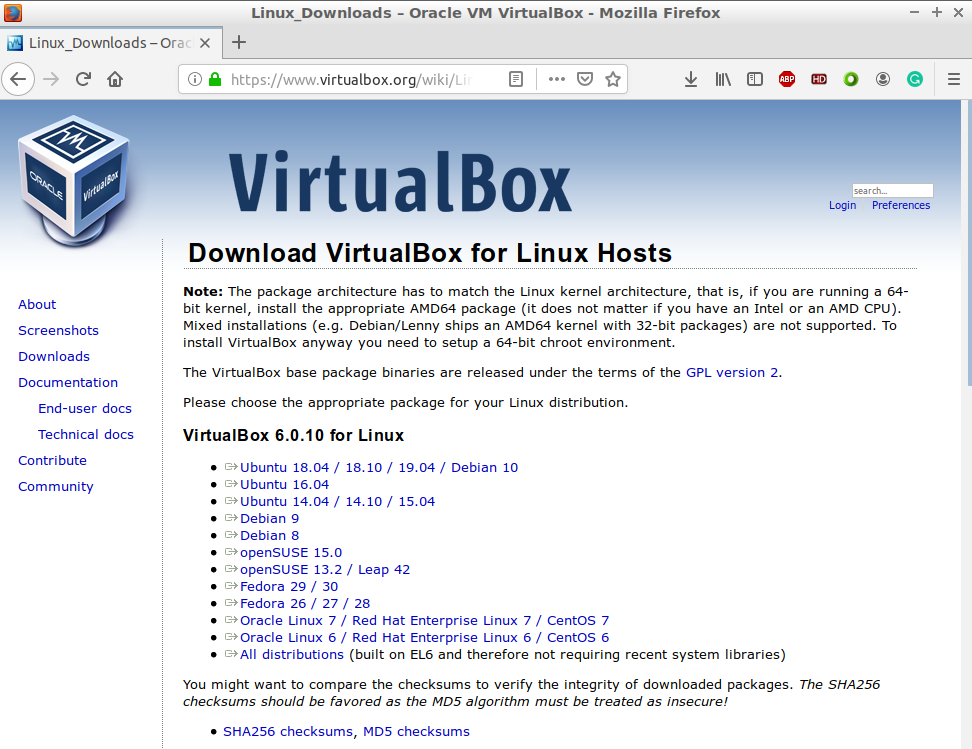
If you don’t already have VirtualBox installed on your system; download and install virtualization software on your computer. Oracle VirtualBox for Linux is free.
You can find a better description here.
To determine the codename for your system, you can execute the following command from the terminal lsb_release -a.
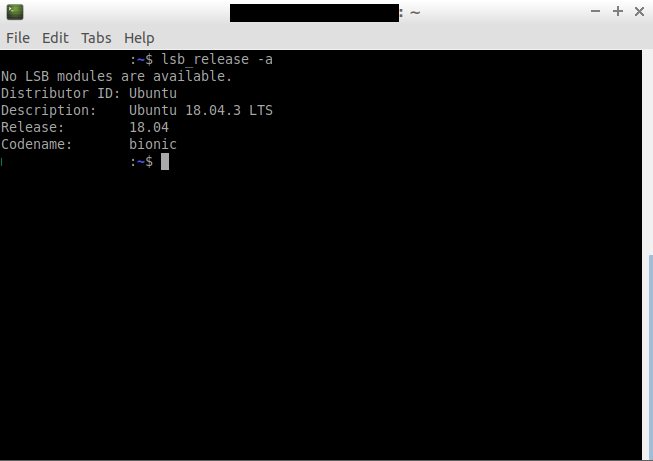
From the above-described results, I will download the Ubuntu 18.04 /18.10 / 19.04 / Debian 10 given choice as seen on the below screenshot.
An alternative is to download the file with the wget command from the terminal.
wget https://download.virtualbox.org/virtualbox/6.0.10/virtualbox-6.0_6.0.10-132072~Ubuntu~bionic_amd64.deb
Now, to install, execute the following command from the terminal.
sudo dpkg -i virtualbox-6.0_6.0.10-132072~Ubuntu~bionic_amd64.deb
Then type your root password and let it install; in my case, my root password is mysupersecretpassword.
Once the install is complete, you can find the VirtualBox launcher under the System Tools menu with the name Oracle VM VirtualBox.
To execute, click on it, or from the terminal type:
VirtualBox %U
Then, it will open the following window.
An alternate installation
An alternative to the above process that will keep your VirtualBox updated will be by installing it from the command line as follows.
sudo apt-get install virtualbox
You might note that the version installed is not the most current release and it seems to lack some functionalities, but you can give it a try.
Step 2: Create folders
Now that VirtualBox is installed and running.
Create a folder named SASUniversityEdition (no spaces) on your local computer in a location you will remember. Then, create a subfolder within the SASUniversityEdition folder called myfolders (no spaces). This location is where you’ll save all your SAS University Edition files.
You can create these folders with your favorite file manager explorer or from the command line as follows:
mkdir -p ~/SASUniversityEdition/myfolders/
The above command will create the folders under your /home/<your-user-name>/SASUniversityEdition/myfolders/ folder.
Step 3: Download SAS® University Edition
To Download SAS® University Edition, you must:
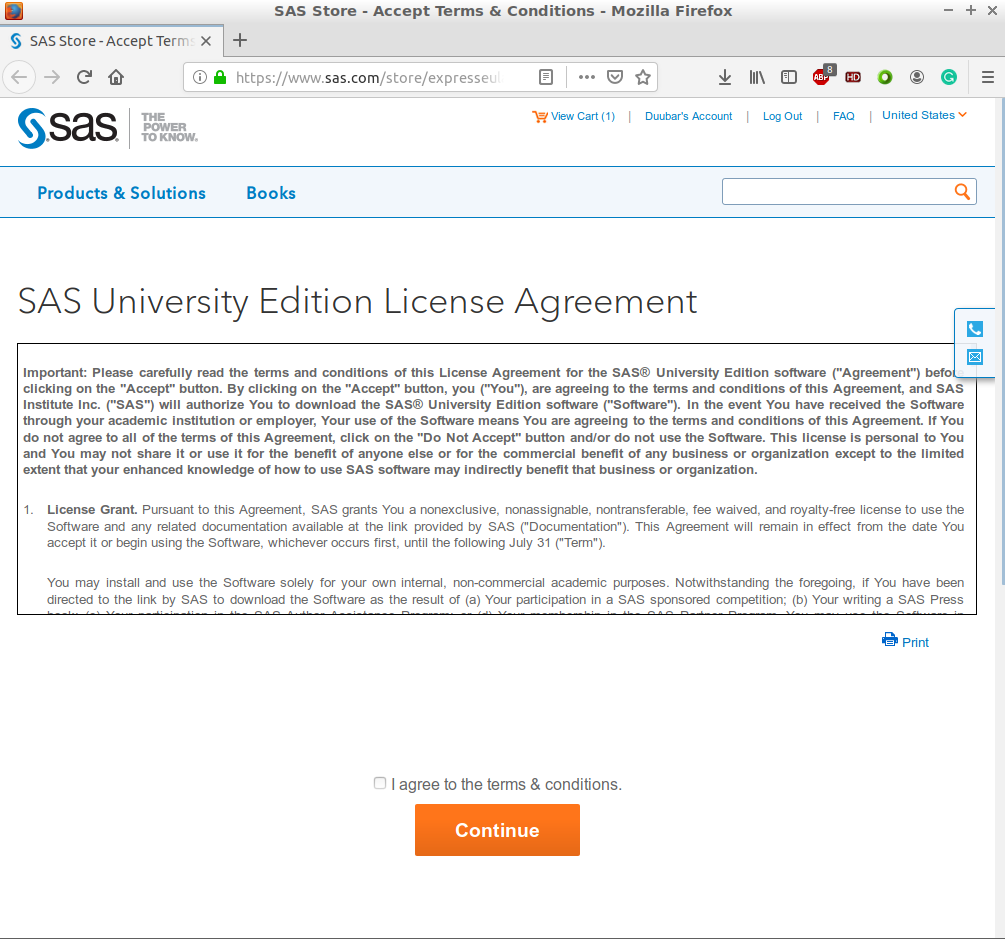
Visit http://www.sas.com/store/expresscheckout.ep?item=DPUNVE001_VirtualBox and create a SAS Profile, or sign in if you already have one.
After you’re signed in to your SAS Profile, accept the license agreement terms and conditions.
On the Order Summary Page, click the Download link, and the download will begin. (If your browser prompts you to save or run the file, click Save to save the file in your Downloads directory.)
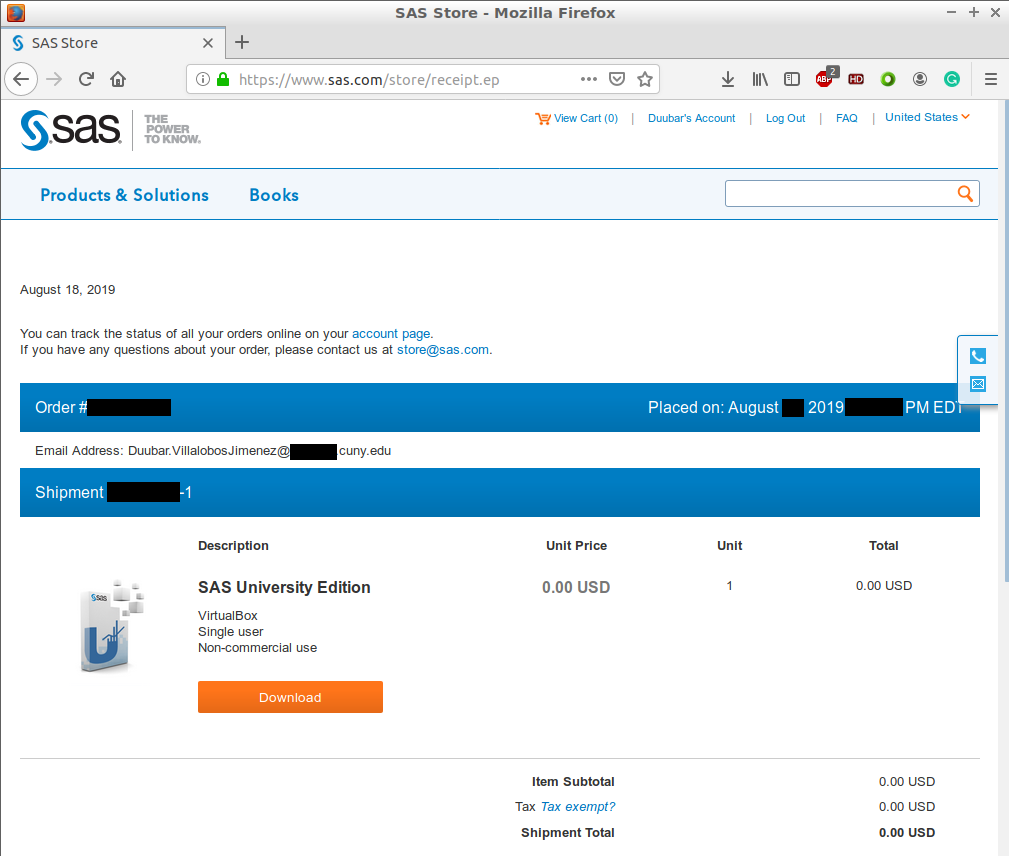
Note: The file is more than 2.3GB. Depending on your internet connection, it might take a while to download. “Remember – you’re getting the world’s most powerful analytics software. It’s worth the wait!”
Step 4: Configure SAS® University Edition
To import SAS University Edition into VirtualBox, you need to do as follows:
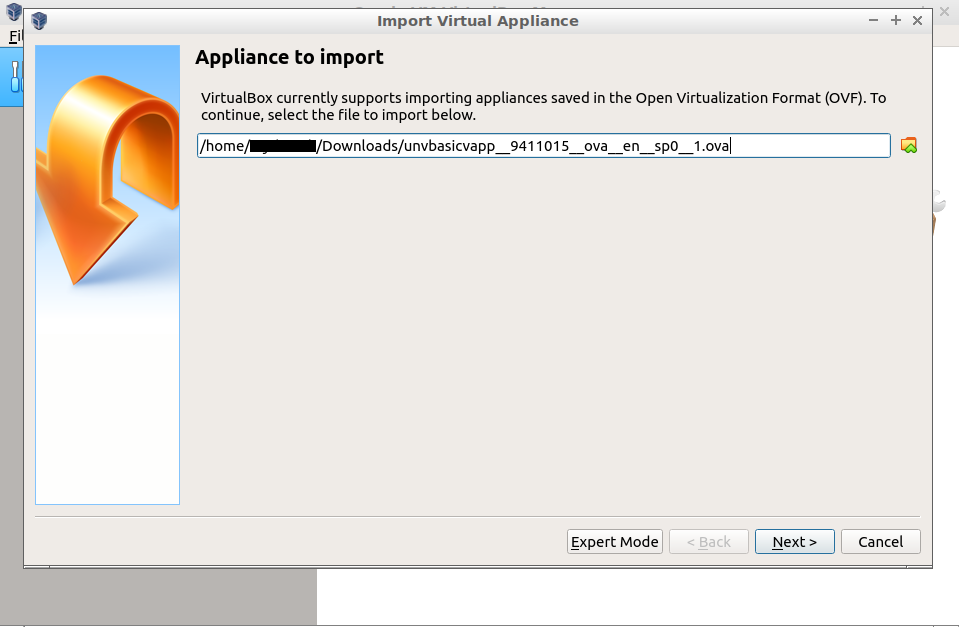
Launch VirtualBox and select File > Import Appliance.
Please note that my appliance was saved under my username’s Downloads folder with the following name unvbasicvapp__9411015__ova__en__sp0__1.ova.
In the file browser window, select the SAS University Edition .ova file, and click Open.
Click Next to get a visualization of the Appliance settings.
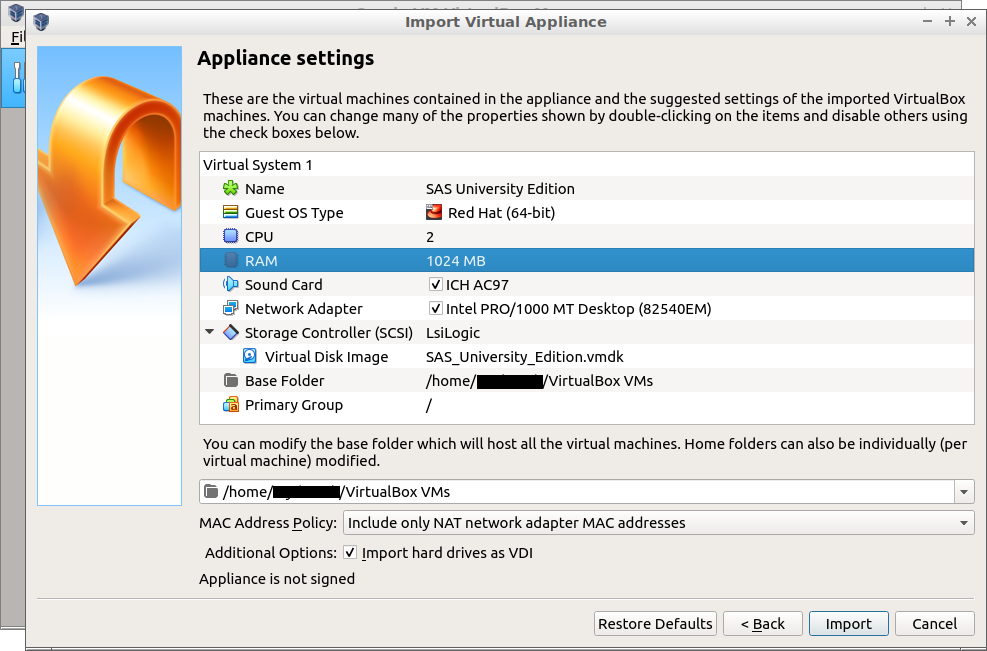
After you click Import, this process will take some time. You will be able to see a progress bar indicator.
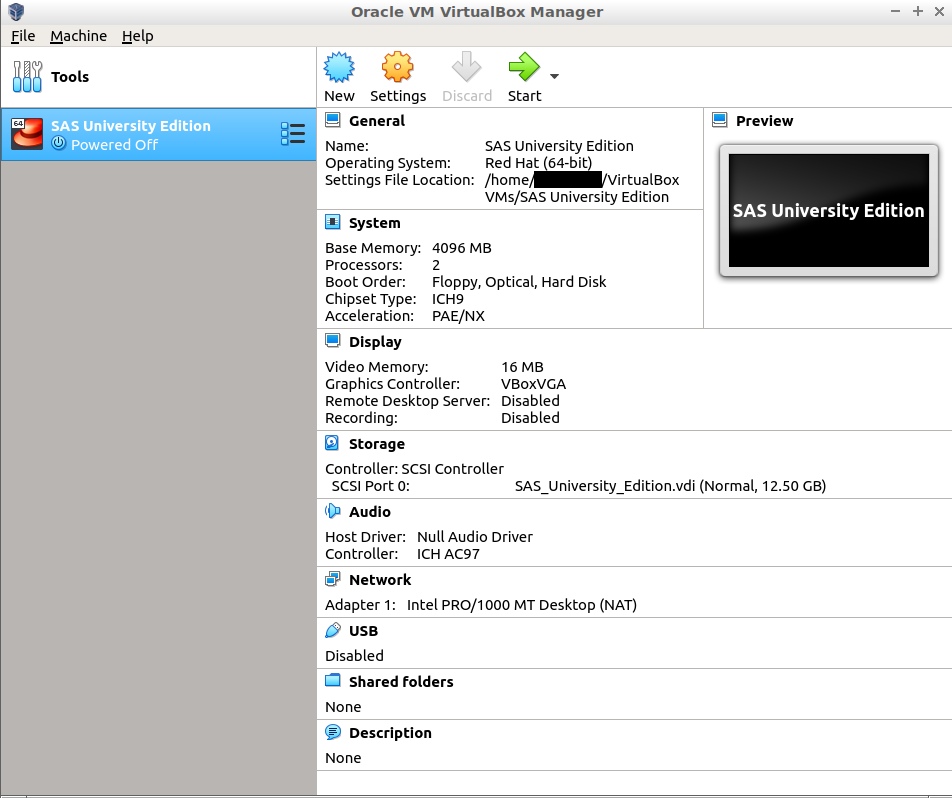
To maximize your SAS University Edition virtual edition, you could change the amount of memory and the number of processors used from the settings provided; in my case, I have assigned 4GB of memory instead of the 1GB default provided, and two processors instead of 1.
Congratulations, now you have SAS University Edition running under a 64 bits Red Hat Operating System successfully imported into VirtualBox.
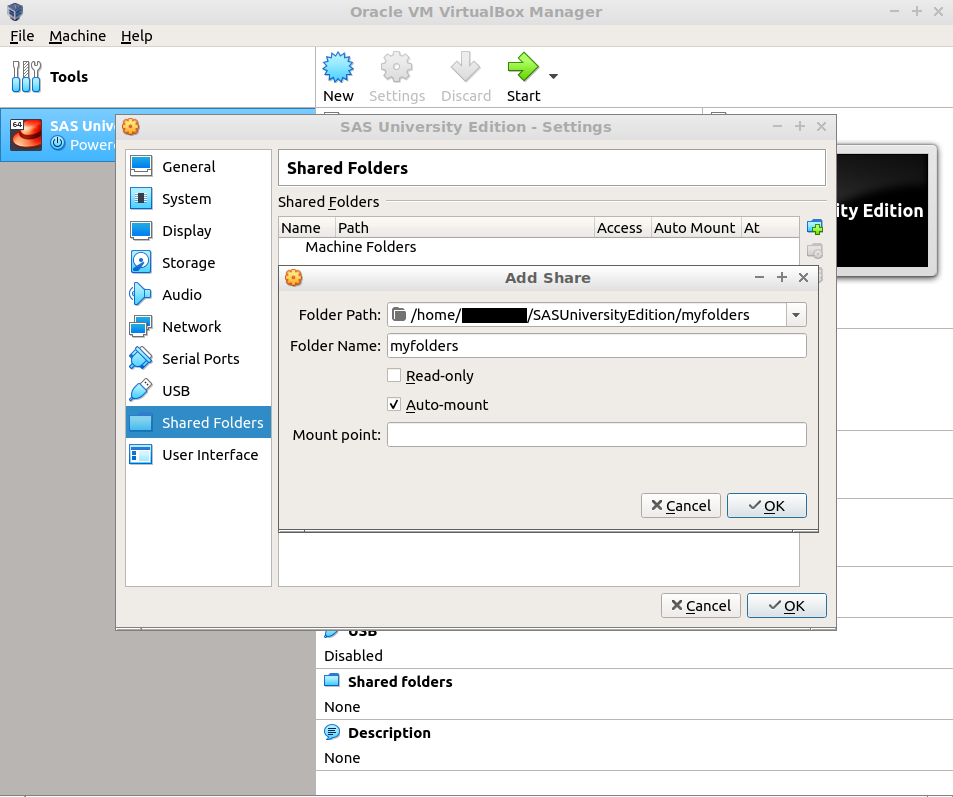
Step 5: Share your myfolders folder with VirtualBox.
Steps:
-
In VirtualBox, select the SAS University Edition vApp, and then select
Machine>Settings. -
In the navigation pane, select
Shared Folders, and then click the Add Folder icon (+) in the upper right of the Settings window. -
In the Add Share window, select
Otheras the folder path. -
In the file browser window, open the SASUniversityEdition folder, and select the
myfolderssubfolder you created in step 1. ClickSelectFolder. Then clickOK. -
In the Add Share window, confirm that
Read-onlyis not selected. -
Select the
Auto-mountoption and clickOK. -
Click
OKagain to close the Settings window.
That’s it; now you are ready to run SAS University Edition.
How to run SAS University Edition
As you can see, on the top, there’s a green icon with the word Start. You can execute the appliance in that sense.
Important
When I tried to execute the appliance, I quickly realized that my machine wouldn’t work on my current system configuration; the reason was that I did not enable the PC’s virtualization VT-x capabilities from the Bios prior. Hence, I had to reboot my server into the Bios and allow virtualization technologies to execute from it.
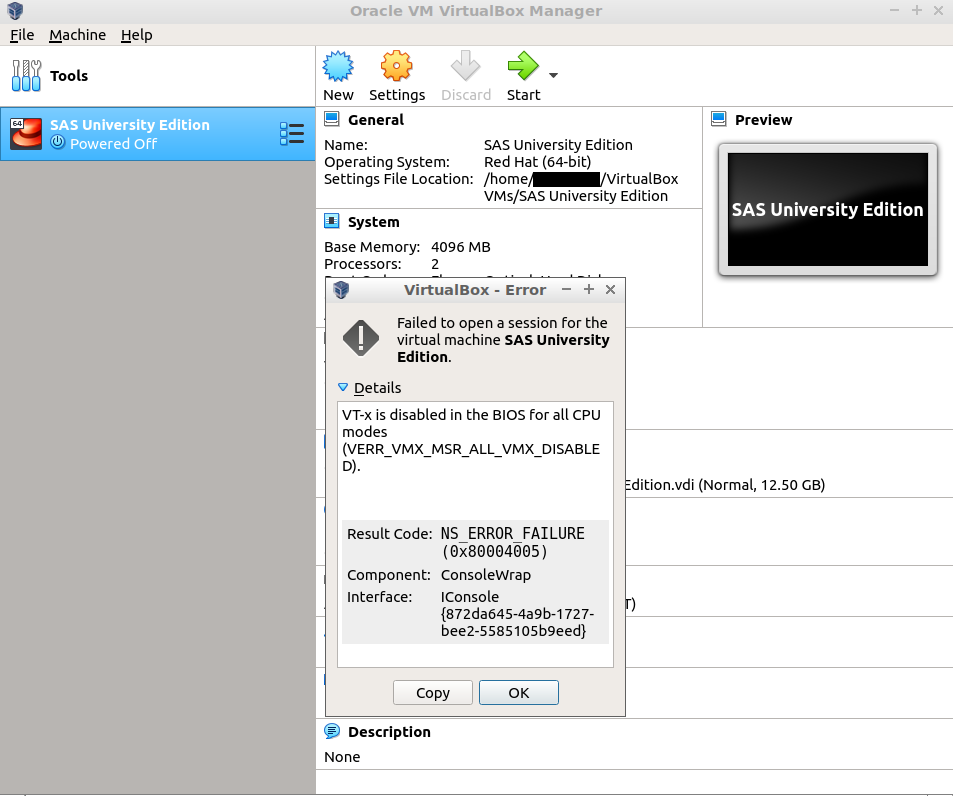
Once I did that, I rebooted my system, and then, my appliance worked exquisitely.
Start SAS University Edition
Once you fix the virtualization issue, you should be able to see the boot process as follows:
After the machine boots up, you should be able to see the instructions presented in the following screenshot.
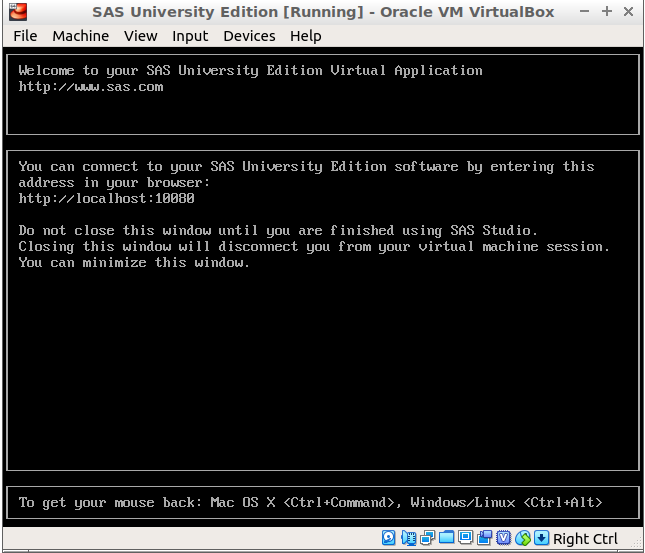
Visit http://localhost:10080
After you receive the above instructions, you can then open your favorite browser and visit http://localhost:10080; the home page shows the following info.
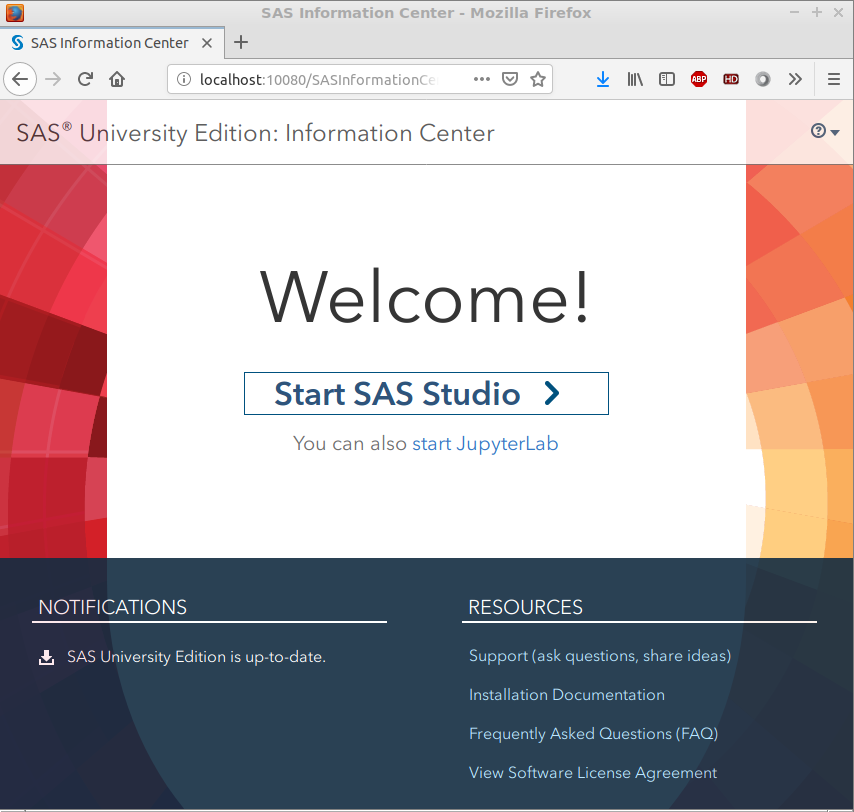
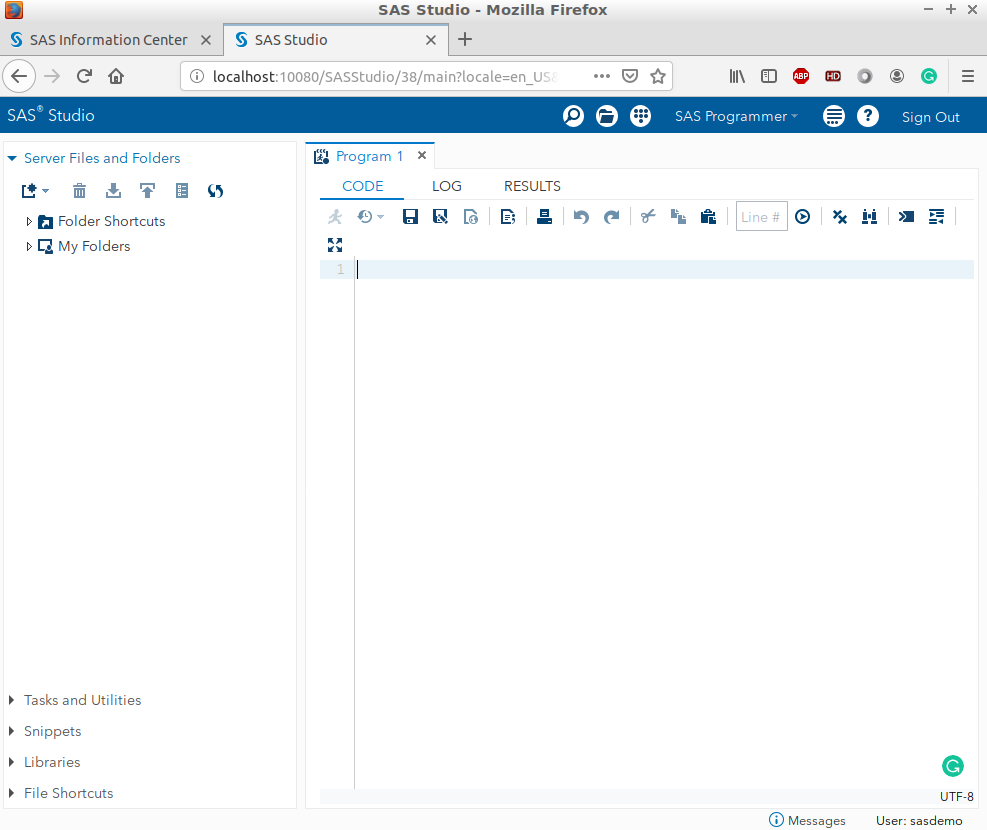
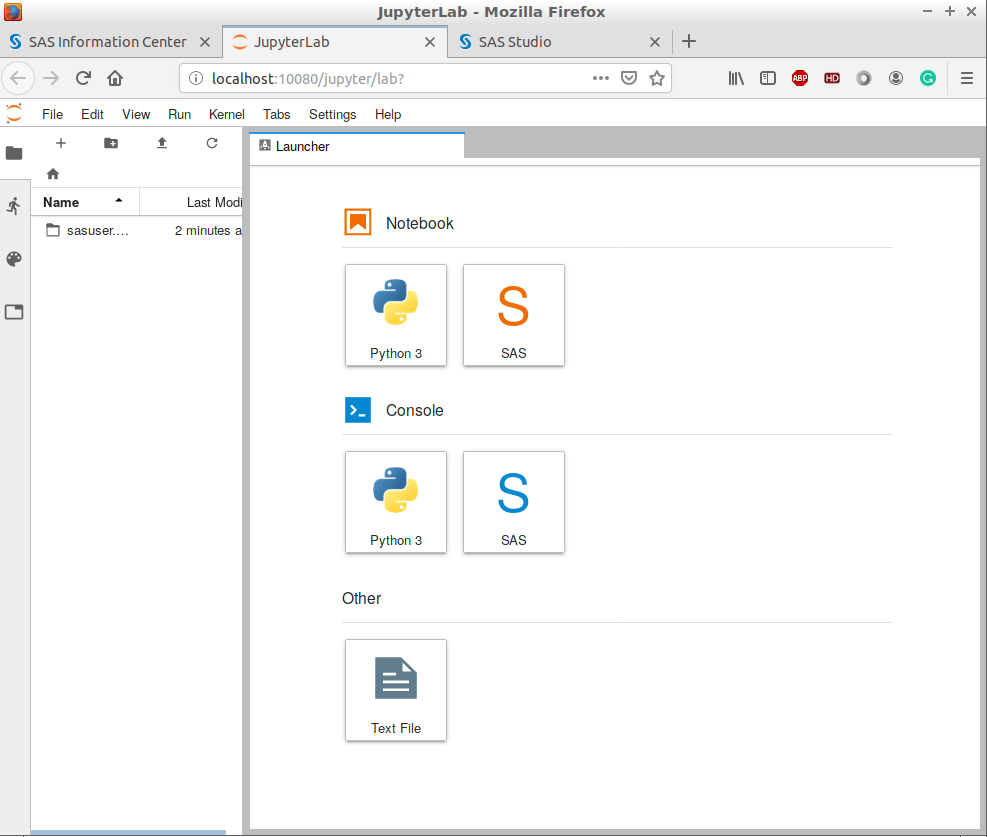
From the SAS University Edition: Information Center, click Start SAS Studio.
You can also start JupyterLab by visiting http://localhost:10080/jupyter as seen below.
Advanced setups for remote execution
Currently, the SAS University Edition Virtual Machine isn’t reachable via the network. This limitation is a setback since I have transformed my home server into a data science server. From my perspective, not having network connectivity with the SAS University Edition Virtual Machine is counterproductive, especially if it is running in a server. A suggested alternative, will be to run an AWS instance as described on their site.
You can corroborate this by typing your remote server’s address with the port 10080. You will get the following time out response.
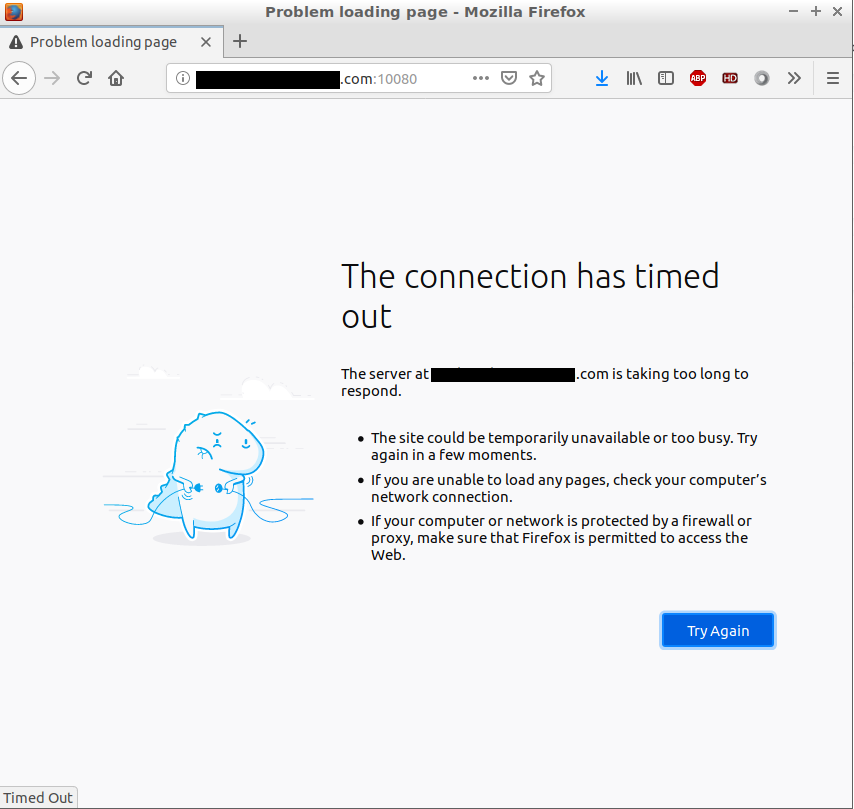
As you can see, if you try to connect remotely to your data science server by using your browser, and typing your remote address, it won’t work. The server seems that it can not handle the request and will time out. I looked for an alternate solution by opening ports from my firewall and performing port forwarding. The information provided referencing this issue by SAS is very limited.
Based on that, two easy ways to connect are as follows:
Option 1: HTTP
This workaround is straightforward and less secure. All you have to do is to forward ports to a Virtual Machine and use it as a server.
Step 1:
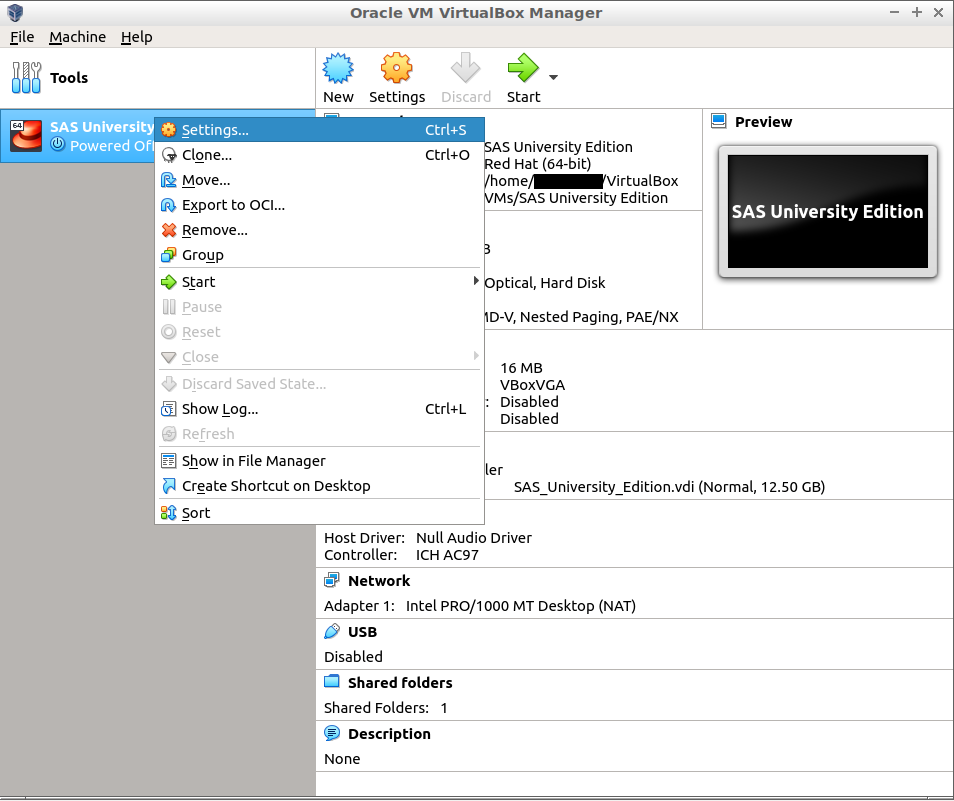
To forward ports in VirtualBox, first, open a virtual machine’s settings window by selecting the Settings option on the menu.
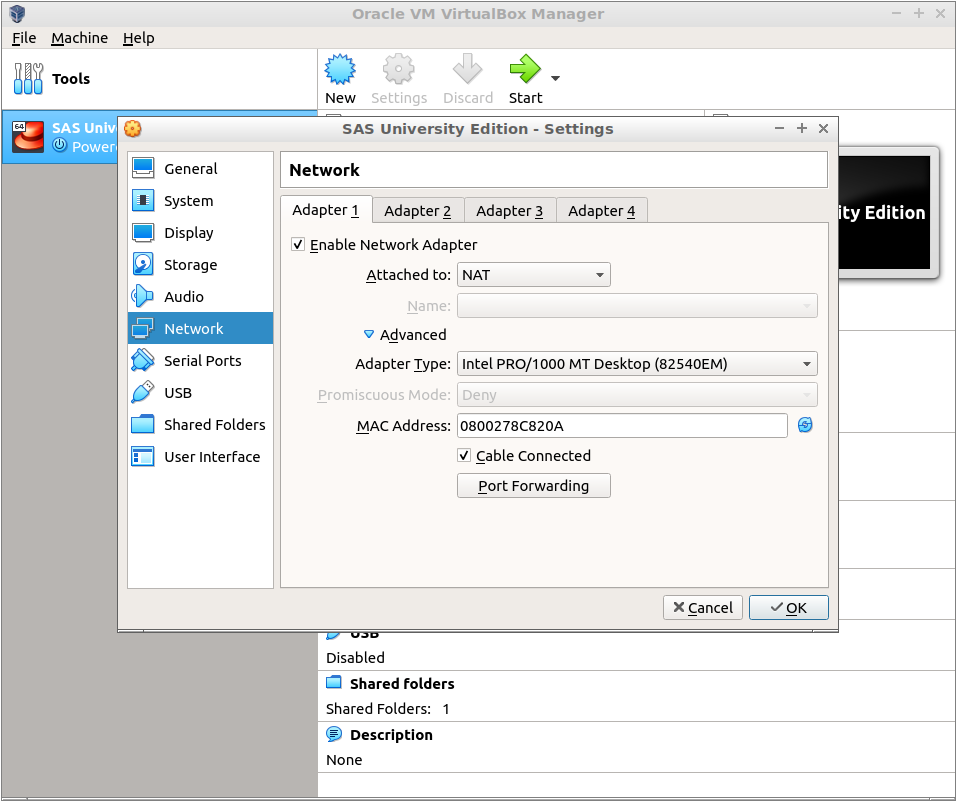
Step 2:
Select the Network pane in the virtual machine’s configuration window, expand the Advanced section, and click the Port Forwarding button. Note that this button is only active if you’re using a NAT network type – you only need to forward ports if you’re using a NAT.
Step 3:
Use VirtualBox’s Port Forwarding Rules window to forward ports. To attain the access, from a remote location, you don’t have to specify any IP address on the Host IP next to Host Port 10080 (leave it blank).
Note: While you don’t have to enter any IP details, leaving the Host IP box blank will make VirtualBox listen on 0.0.0.0—in other words, it will accept all traffic from the local network and forward it to your virtual machine. Enter 127.0.0.1 in the Host IP box, and VirtualBox will only receive traffic originating on your computer—in other words, on the host operating system.
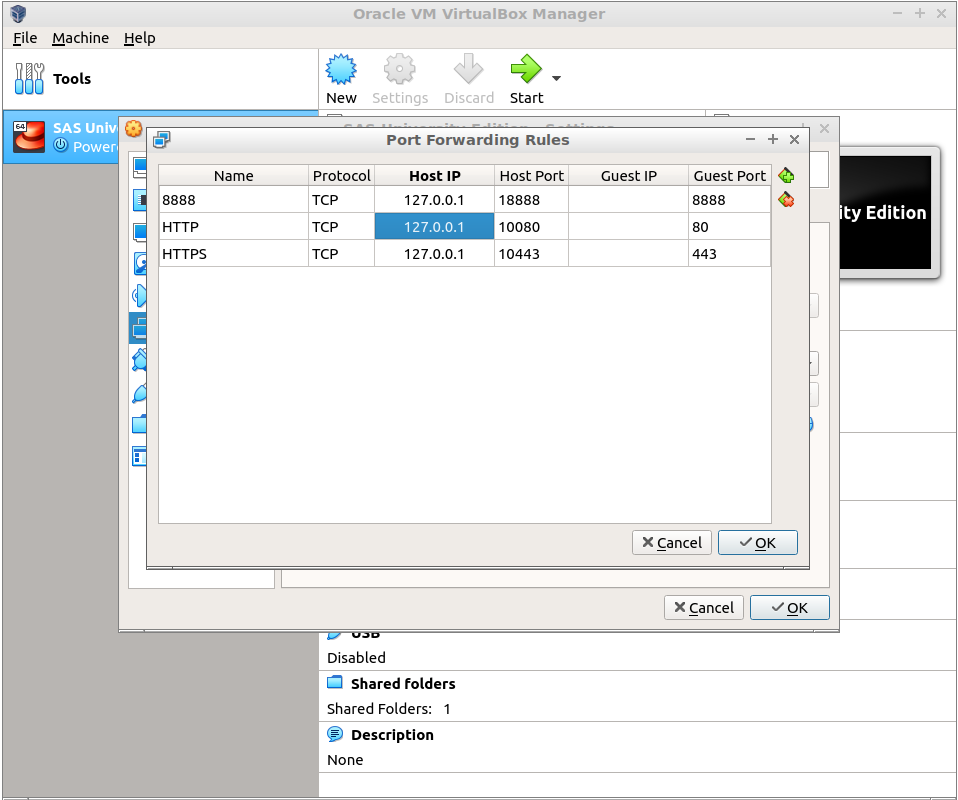
Leave it blank.

Press OK to return.
Now you can restart SAS University Edition for the changes to take effect.
Step 4
Open port 10080 by executing the following command from the terminal.
sudo ufw allow 10080/tcp # SAS
That’s it; now you can connect remotely using your favorite browser by typing your home’s IP address as follows: [http://YOUR HOME IP ADDRESS:10080]
Option 2: SSH Tunneling
This workaround will allow you to connect through SSH Tunneling. This approach provides a secure connection.
Step 1: Install VBoxManage.
This tool will allow us to run VirtualBox Virtual Machines without GUI from the command line.
With the VBoxManage tool, we can now take advantage of the command line to start, pause, and power down our SAS University Edition Virtual Machine.
This approach makes it much easier to run the SAS University Edition Virtual Machine without having to be at the host machine; with this option, you can SSH Tunnel into the host, and then perform your training remotely without having to sit in front of your server.
Steps to install VBoxManage.
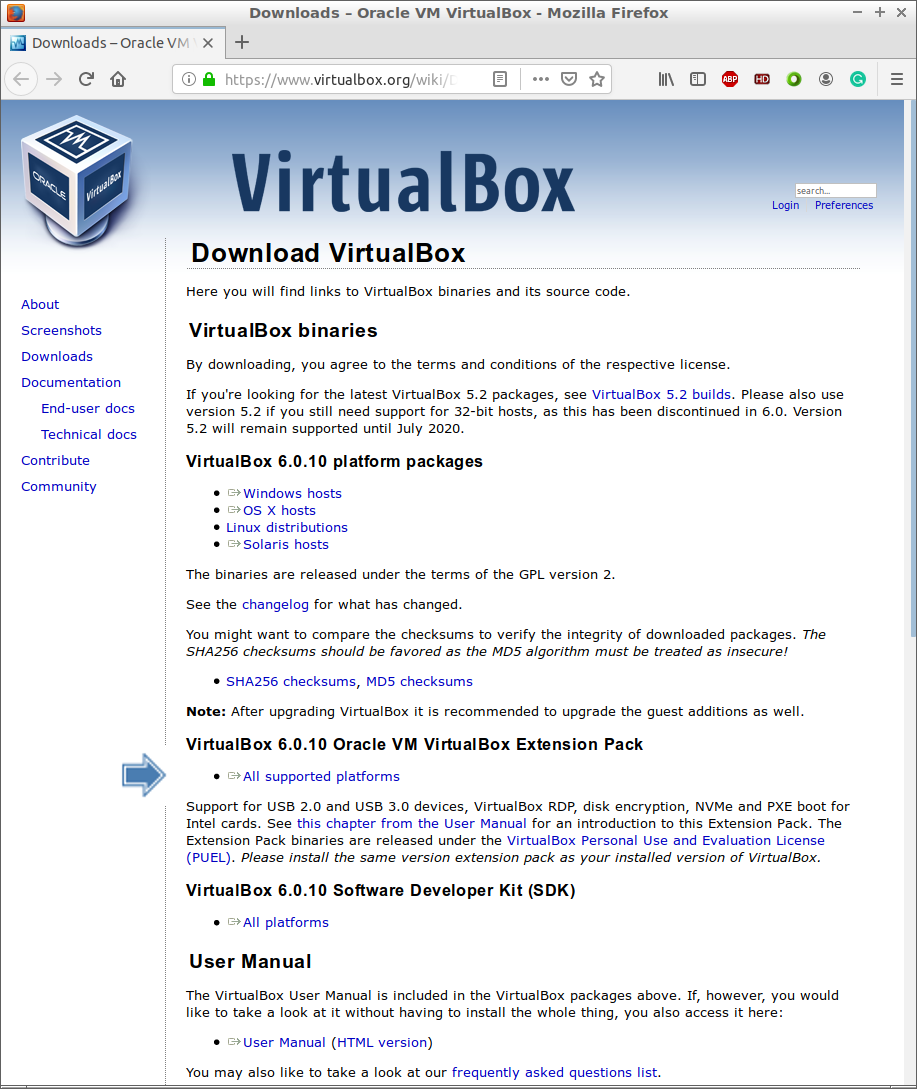
You can start by downloading the extension pack that matches your VirtualBox release from https://www.virtualbox.org/wiki/Downloads.
Since the currently installed version for the VirtualBox environment is the version 6.0.10 (as noted above); you could also execute from the command line as follows:
wget https://download.virtualbox.org/virtualbox/6.0.10/Oracle_VM_VirtualBox_Extension_Pack-6.0.10.vbox-extpack
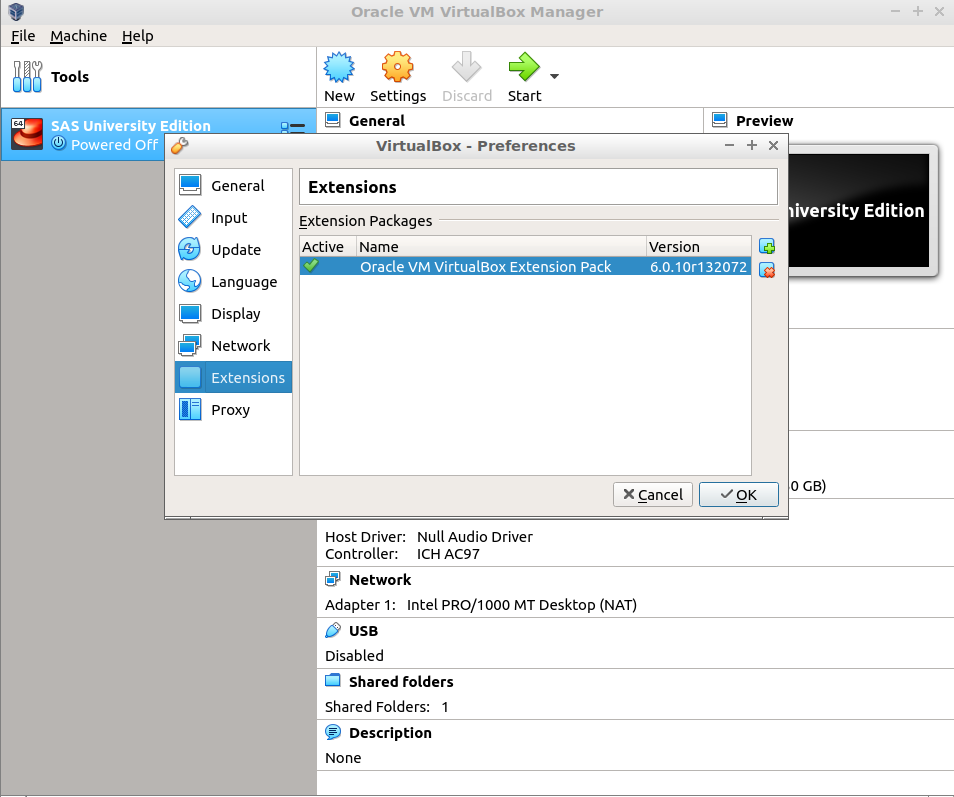
Once you have downloaded the extension pack, open your VirtualBox GUI environment and do as follows:
- Click
File>Preferences. - Go to the
Extensionssection. - Select
Add New Package. - Navigate to where you saved the Extension Pack and select the
.vbox-extpackfile. - Click
Open. - When prompted, type your
admin passwordfor the host machine. - Click
OK.
After you do all that, you should see something like the below screenshot.
Now, you’re ready to run any of your virtual machines from the command line, which will include the ability to reach SAS University Edition Virtual Machine via a network.
Step 2: Connect from a remote client using SSH Tunneling.
To connect to your server using SSH Tunneling from a different computer running Linux or Mac, run the following SSH command from the terminal:
ssh -L 10080:localhost:10080 <server_username>@<server_address.com>
Where <server_username> is your host’s user name; in my case is administrator and <server_address.com> is your server’s web address; when prompted, type Yes and then type your host’s password; in my case will be mysupersecretpassword.
For windows users, you need to use other tools such as Putty for example.
Step 3: Starting/Stopping/Pausing a Virtual Machine from a remote client using SSH Tunneling.
The following are the most important commands:
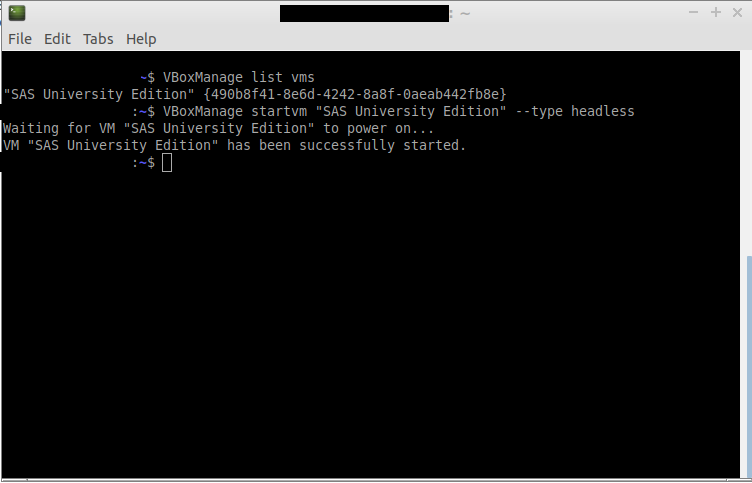
VBoxManage list vmsThis command will display all the virtual machines, as well as their unique IDs.
VBoxManage list vms
To run the “SAS University Edition” Virtual Machine as a headless instance type:
VBoxManage startvm "SAS University Edition" --type headless
The VM will boot up and hand you back your bash prompt. Your virtual server is now available to you.
Step 4: Go to http://localhost:10080.
In your remote client, now you can open your browser and type: http://localhost:10080
To pause the Virtual Machine, type the command:
VBoxManage controlvm "SAS University Edition" pause --type headless
To restart that paused VM, type the command:
VBoxManage controlvm "SAS University Edition" resume --type headless
To shut down the VM, type the command:
VBoxManage controlvm "SAS University Edition" poweroff --type headless
Now, you have the capability to start, stop, and pause your Virtual Machines from the command line, which is an incredibly convenient feature.
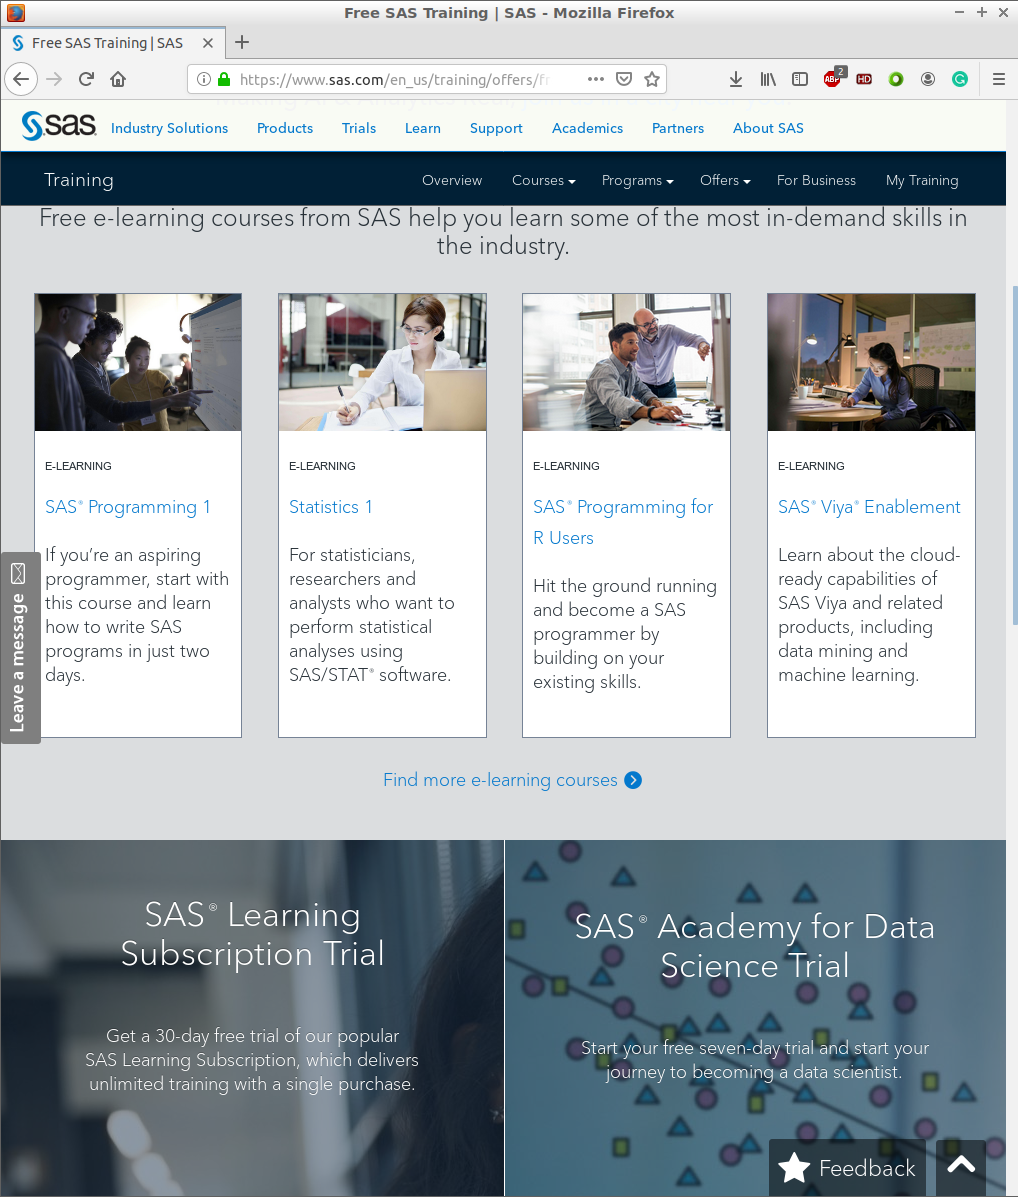
Free Training
You can get a quick, easy start with SAS® online training without spending a dime; for this, visit https://www.sas.com/en_us/training/offers/free-training.html.
In my particular case, since I have experience programming in R; I picked the SAS® Programming for R Users; thus, allowing me to become a SAS programmer by building on my existing skills.
To get started, create a profile, and explore your options.
Conclusion
After performing all the above steps, I can successfully run my desired Virtual Environment with a state of the art technology from anywhere in the world.
SAS University Edition is an excellent source of knowledge from which I hope to keep learning and exploring as much as I have done above.