
In this guide, I will provide you step by step instructions to build your home server successfully.
Difficulty: Super Easy.
Time consuming: About 1 hour.
Cost: Free (Open Source Licensing).
Goal: To install the server image of Ubuntu 18.04.1 LTS (Bionic Beaver) via the Alternate installer on your PC. If you would like to read a little bit more about Ubuntu, you can find this Wikipedia site very informative.
The server install image allows you to install Ubuntu permanently on a computer for use as a server. This install will not create a graphical user interface yet.
Why Ubuntu? If you would like to know why I am so thrilled about this, you can find a great article here. If you read the article, you can find out that Ubuntu currently powers tomorrow’s technologies such as Artificial Intelligence, Blockchain, Autonomous Cars, and Robotics, just to mention a few.
As you can see, I am preparing your system to have use of state of the art technology.
Preparation
First, we need to make sure that everything is plugged in, that is:
- Power Cord.
- Monitor.
- Keyboard.
- Mouse.
- Internet.
- An empty USB drive (1 GB is good).
- CD or DVD Reader/Burner.
- Blank CD or DVD.
- Notebook and pen to write notes.
Minimum requirements
To install and run this system successfully, your computer needs to have the following minimum requirements:
- Memory: minimum of 1 GB of RAM, although a recommendation higher memory is better, thus for better performance.
- Processor: minimum Pentium 4, Pentium M, or AMD K8 CPU or newer.
- Hard Drive: minimum 80 GB or more significant.
Back up your data
Now, that you ensured that everything is connected correctly and that your system meets the minimum requirements, I will recommend you to back up your data in at least two different locations. If you do not back up your valuable data, you most likely will lose it, so go ahead and back up your data in an external hard drive or any other means you own separate from the workstation.
Download ISO file
Please note that for this writing I will be using version 18.04 LTS.
My recommendation, based on experience and support is as follows:
-
Download:
ubuntu-18.04.1-server-amd64.iso 2018-07-25 03:00 715M
Please note that the above download name might change if they add a new release, the current version at the time of this writing is the 18.04 release .1 dated 07/25/2018 and its size is 715 M.
Create bootable USB or create a bootable ISO image in a DVD
My recommendation is to create a portable bootable USB device; it does not require much time or resources, all you need is a minimum of 1 GB USB that you are not using, and you can dispose of it. Remember, the procedure will erase the information stored in that device; so, be aware!
Make a bootable USB drive
There are many ways in order to create a bootable USB drive; one of the most used is the UNetbootin; another one is Rufus. You can pick either one and follow their instructions. The main goal at this point is to create a bootable USB drive.
If you need further guides, there are plenty of websites that could help you, or take a look at this tutorial in case you would like to know more about it. YouTube also has many resources available.
Alternative: Make a bootable DVD.
Ubuntu offers a great guide on how to get this done. If you would like to burn a CD or a DVD instead, you can find their guide here. If you are having difficulties, I remember at one point using Infra Recorder and it did the job just well; you can find a great guide here.
Boot from DVD or USB drive.
If you want to avoid frustrations read this, if not, skip and then come back!
From my frustrated attempts, my best recommendations are as follows:
First: boot into your computer’s BIOS. You can usually do this by pressing the (F1, F10, F12, ESC or DEL) -keys vary from model to model and manufacturer- from your Keyboard as soon as you turn on your computer. To find out what’s your correct key, please look at your machine’s manufacturer and model user guide for that.
Important: Make sure you have a CD Room or USB selected as your first boot option depending on your previous approach.
LEGACY Note: If your equipment supports Legacy, make sure to select the option about LEGACY instead of UEFI; this simple change has the possible implication of avoiding many frustrating hours on your end due to something not right.
Once again, this is something you need to do on your end; my recommendation is to boot into the BIOS system and make sure that you select the Legacy option. I had many frustrating attempts before, and the only way I was able to resolve them was by making sure the Legacy option was selected. This might not be your case, but my workstation is relatively new, and I had to change the system settings for the server installation to recognize my hard drive correctly and to boot after the installation.
This very simple and easy to follow instruction must be performed before you install your system. The reason why I am very direct with this step is that avoiding this simple step caused a whole weekend of frustrating attempts and lots of research on my end; that’s why it is so important. It might be the difference between 4 hours tops and a relaxed afternoon watching movies and going to the park or having about maybe 36 hours pulling your hair wondering what am I doing wrong?
Enable Virtualization: To take full advantage of your system, you need to enable Virtualization technologies if your computer has it. To do so, you need to do it from the BIOS; make sure to save your changes before you exit.
I hope you find this as valuable insight.
Ubuntu Server: Alternate Install
Step by Step
The following are the steps you need to follow to successfully install your primary home server at home, business, or even in a virtual machine. Please note that I have successfully installed my Home Server at home and the screenshots below are taken from a virtual machine that I have run using VirtualBox.
Language selection
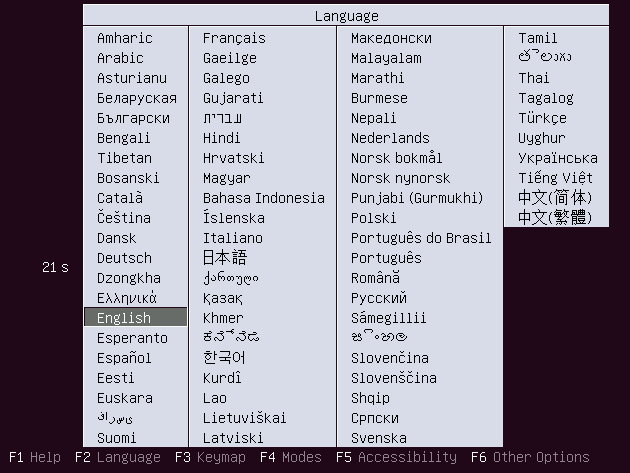
When you boot up your computer, you will get the following screen in which you can select your language; you have 30 seconds to make your selection; if not English will be selected by default.
Install selection
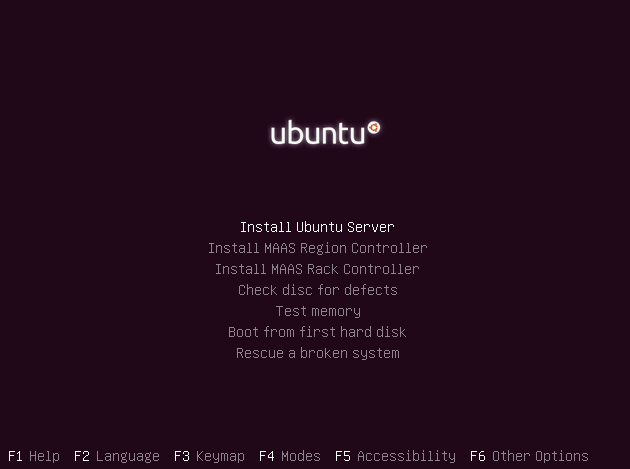
From this screen, we are given multiple choices. The one that we will select is: Install Ubuntu Server; to proceed just hit the Enter key from your Keyboard.
If you would like to Check disk for defects or Test memory, it will be a good idea. That way, you will know that your system is in optimal conditions to run your new server setup if all tests pass. To do so, with the Keyboard move the arrows down and hit enter.
Select language
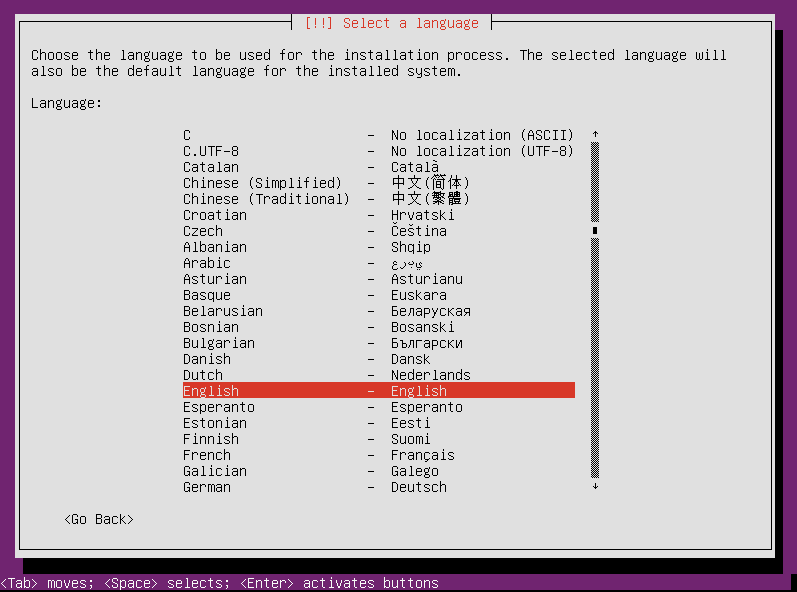
From this screen, we are given multiple choices. You will select the language in which the system will be installed. In my case, I will choose English. Please note that this selection is different from the first language choice; this one is for the installation language while the first option is for the language of the instructions.
Remember: You can scroll the list by moving your keyboard arrows up and down and selected by pressing Enter.
Location selection
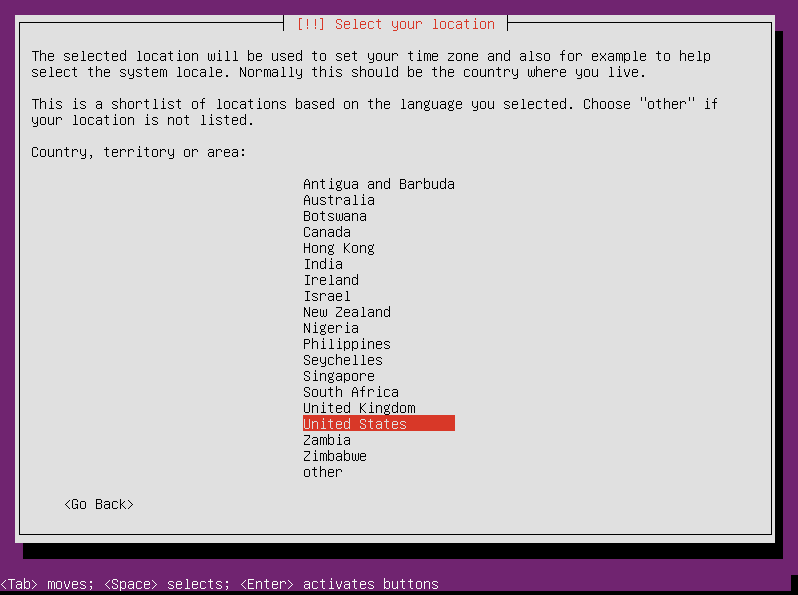
In my case, I will select United States. This might change based on your geographical location; for example, if I am in Costa Rica, I would choose Costa Rica by selecting other. Press Enter to make your selection.
Configure keyboard
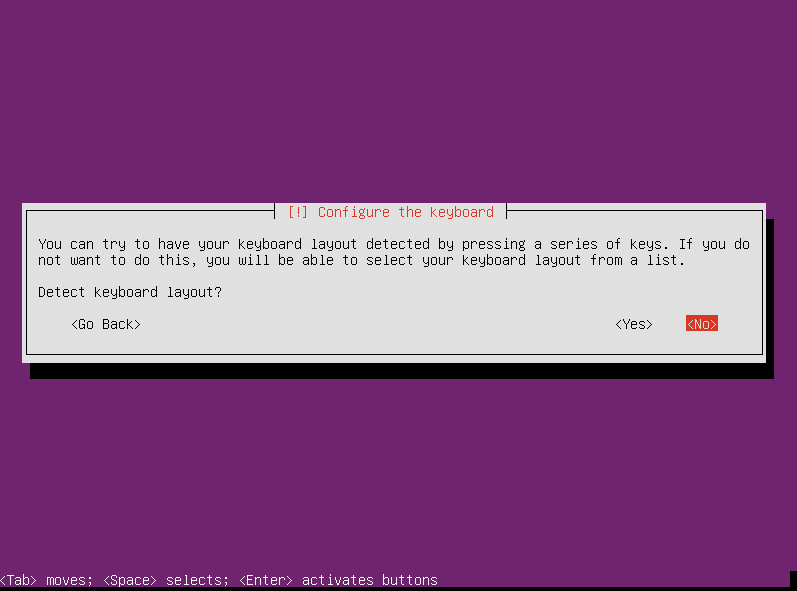
In my case, I will select <No>. The reason is that I already know that my Keyboard is US. Based on your keyboard type, you can select <Yes> and detect your keyboard layout. Press Enter to make your selection.
Keyboard layout
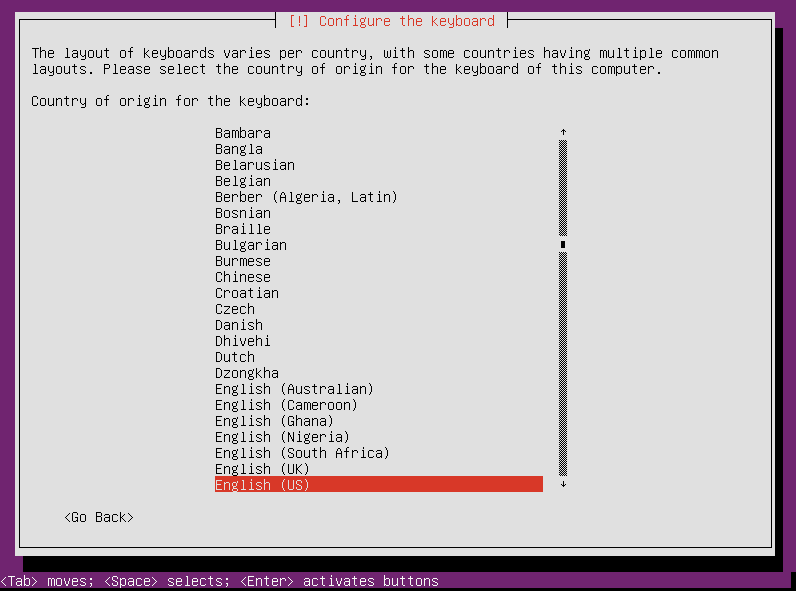
In my case, I will select English (US) but this might change based on your Keyboard’s layout. You can scroll the list by moving your keyboard arrows up and down and selected by pressing Enter.
Keyboard configuration
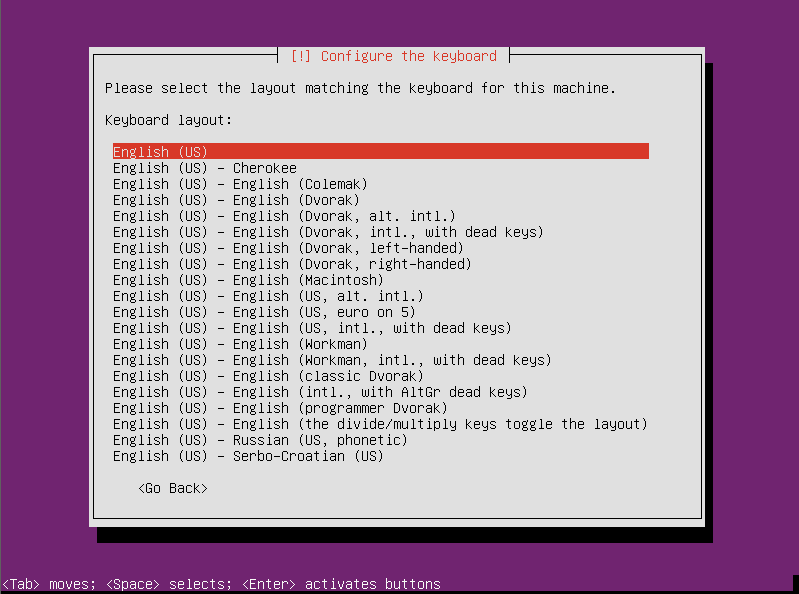
In my case, I will select English (US) by pressing Enter. If you need to make a different selection, use the up and down arrows and press Enter with the option that fits your needs.
Name your server

On this screen, you will name your server. This will be the name you want for your new server. Remember this name since it will define a lot of new things moving forward.
My recommendation is to get a notebook and start writing this information down so you can go back and review it in case you need it. It’s handy.
In my case, I will name it myubuntuserver. The default name is ubuntu, you can change it or leave it as it is. Press Enter once you have a name for your new server.
User full name
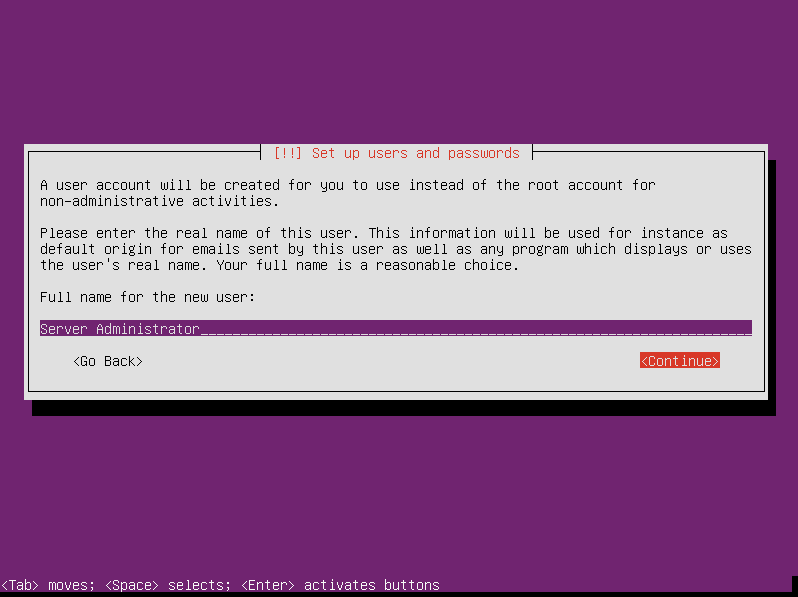
Type your name or the name you would like to give to your server administrator. In my case, I will provide Server Administrator; press Enter when you have the name typed.
User name
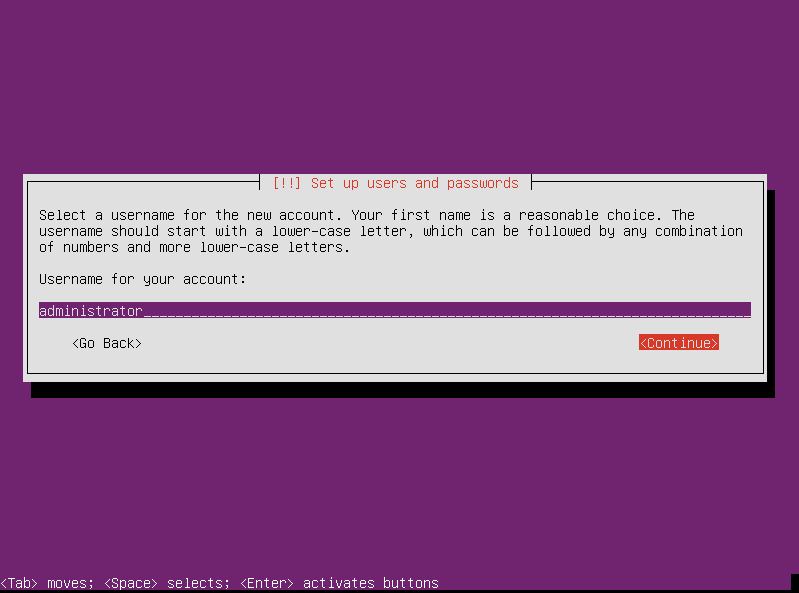
This is the system’s user name that we will use from now on. Write this down in your notebook with the notation user name.
In my case, I will use administrator as my system’s user name. Hit Enter when you typed your user name. No spaces allowed.
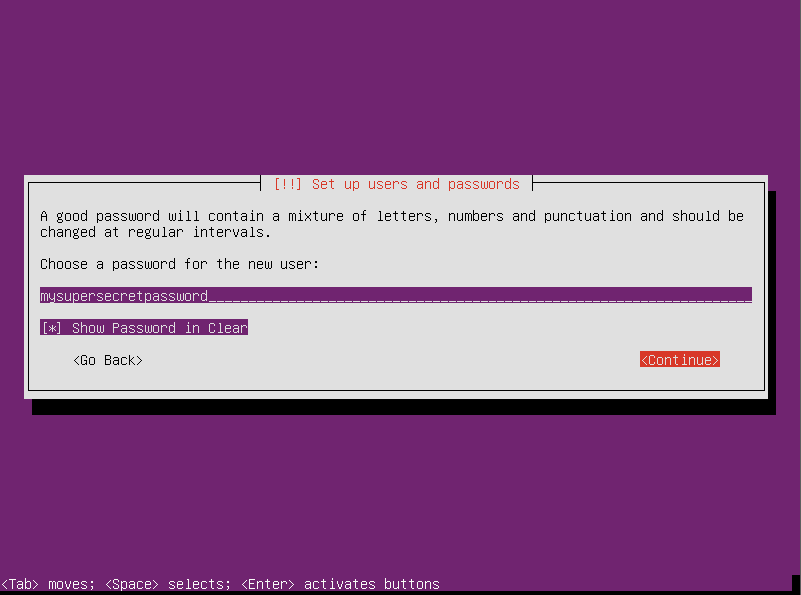
Password
In this section, you will type your super-secret password. In my case and for illustration purposes, I will type mysupersecretpassword as my password. Make sure to write it down in your notebook. Once you have your super-secret password sorted, press Enter.
Password confirmation
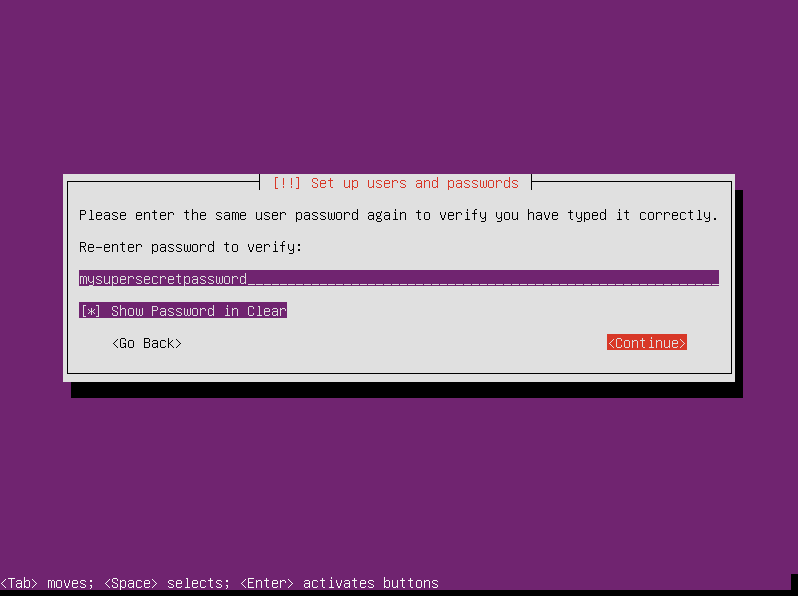
In this section, you will re-type your super-secret password. In my case and for illustration purposes, I will re-type mysupersecretpassword the same as my previous password. Once you have re-typed your super-secret password, press Enter.
Time zone
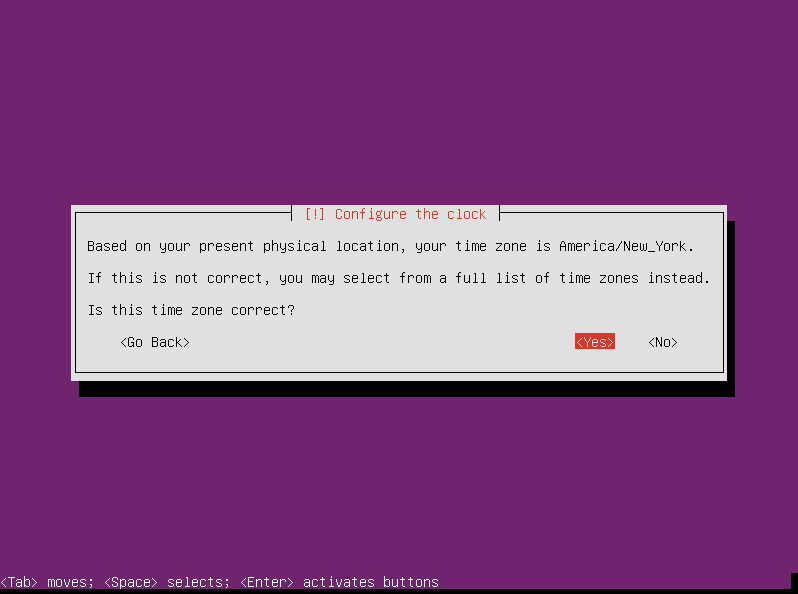
In this section, you will be presented with an automatically selected zone. If this is correct, press Enter. In my case, I live in the New York metro area; so, America/New_York is right for me.
Partition
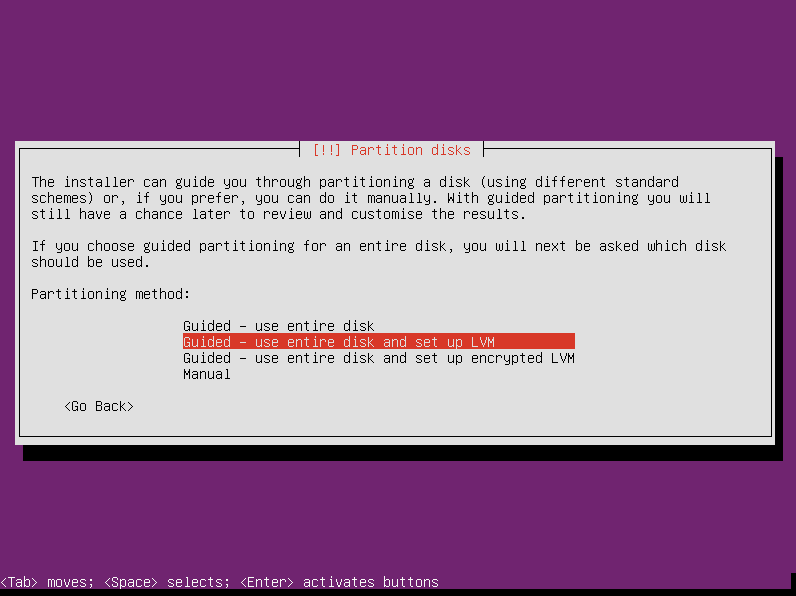
In this section, we are presented with a default choice. For simplicity reasons, you can press Enter. If you would like to learn more about LVM and partitioning of the Disks, you can find extra information here.
Select disk
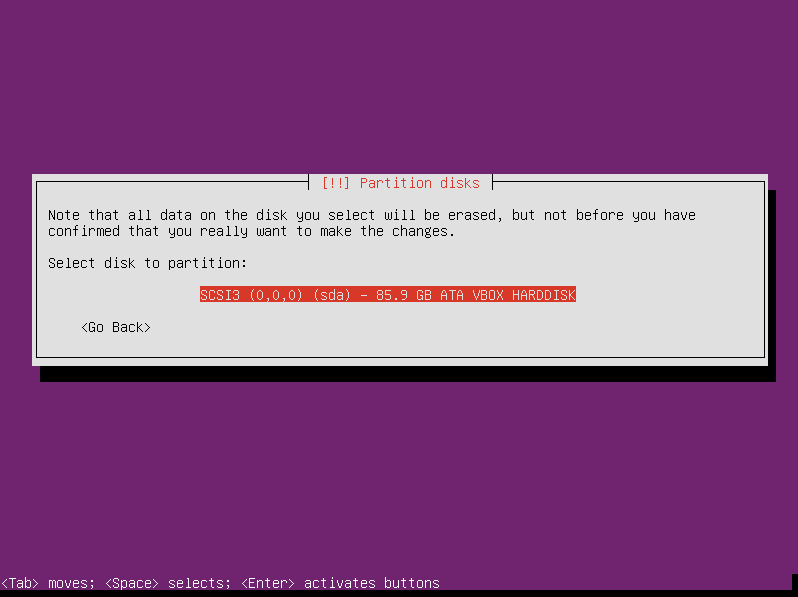
On this screen, you will be given a list of disks and size. Usually, the drive we want to install is the one labeled sda. In my case, I only have one choice, but you could get various opportunities, look carefully for your options, and select the one that is the correct for you. To select, you can use the up and down arrows and then press Enter.
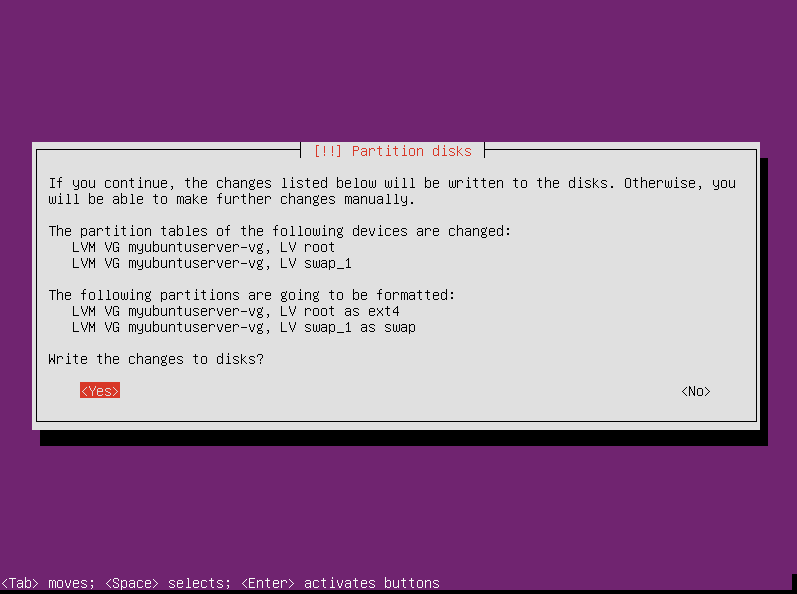
Partition confirmation
In this screen, we are asked if we want to confirm the new changes. Once we select <Yes> all the data stored in that Hard Drive will be erased. To select <Yes> use the left arrow and press Enter.
Disk space
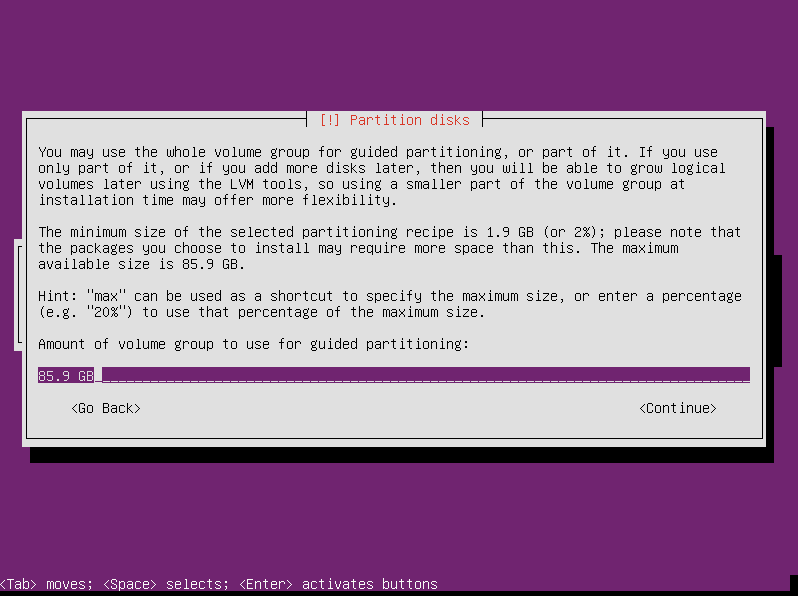
In this new window, for simplicity reasons, we can just press Enter. I am assuming that this might be the first time you are doing something unfamiliar to you. Don’t worry, and please note that the numbers might change based on your hard drive’s capacity.
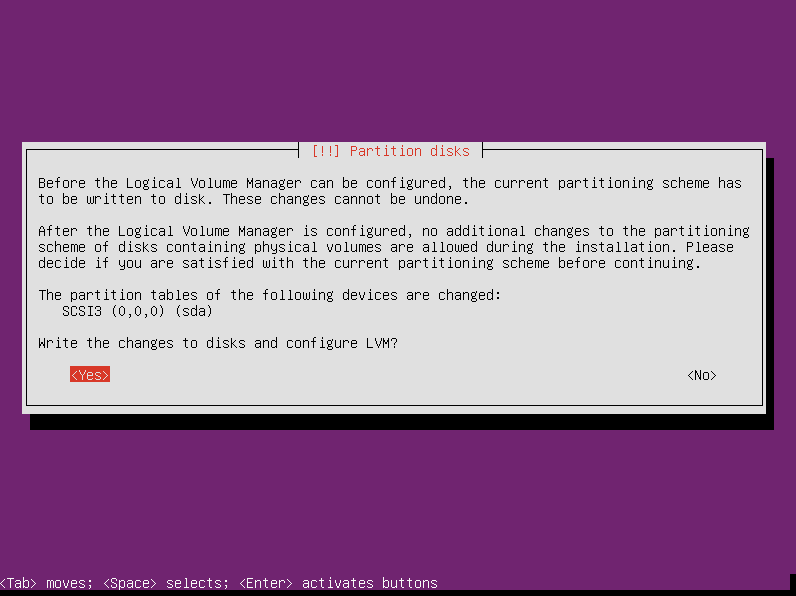
LVM confirmation
In this window, we will select <Yes>. To do so, use the left arrow and press Enter.
Installation
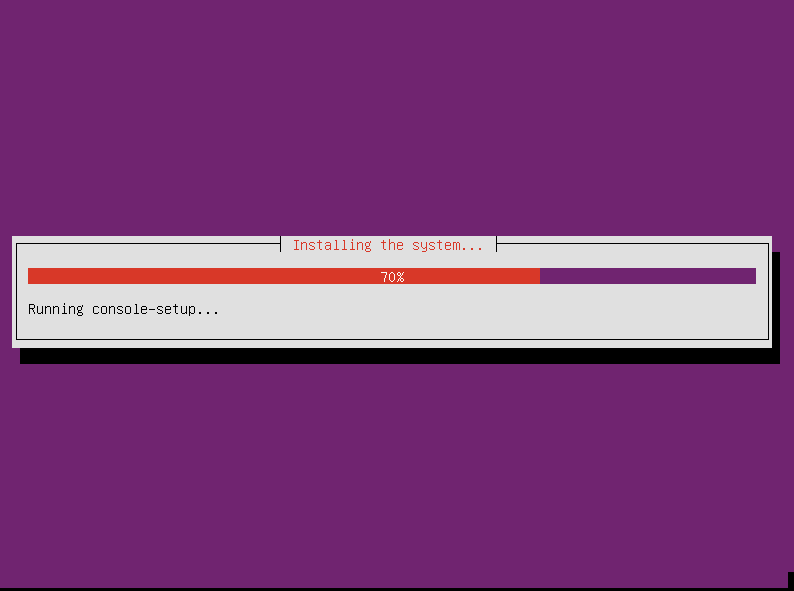
Now, the computer is proceeding to install your Ubuntu Home Server. Just sit and wait until you get the next screen.
Proxy setup
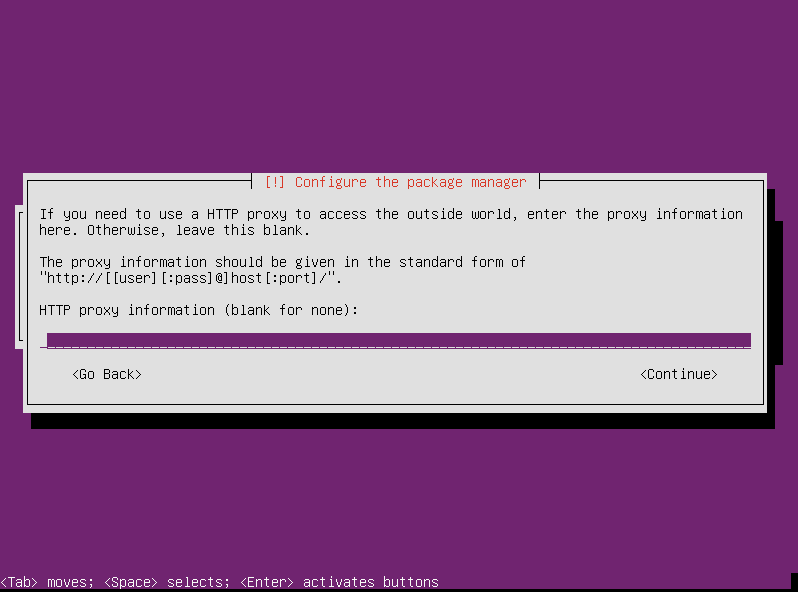
Under special circumstances, we need to type the proxy address here. This is very rare and more advanced. In this case, just press Enter to continue.
Automatic updates
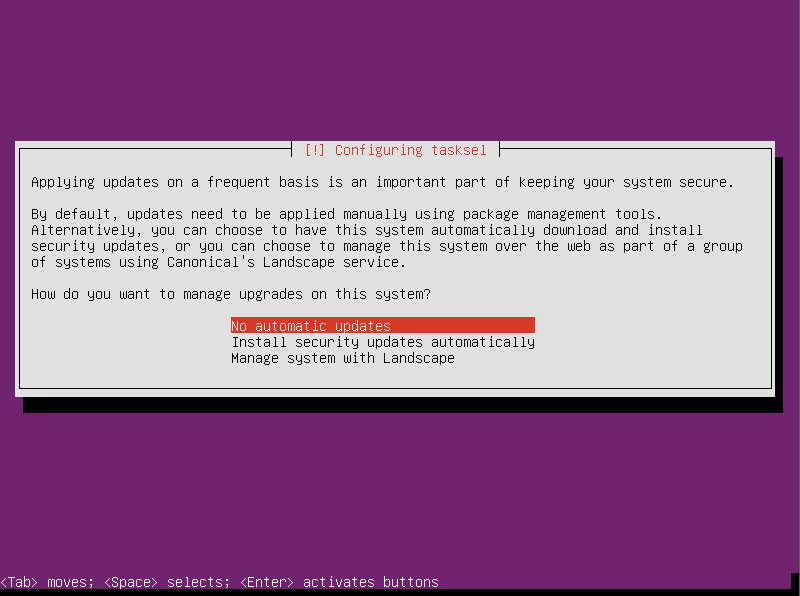
In this case, I like to update the system myself. So, I will select No automatic updates. Press Enter to continue.
OpenSSH server
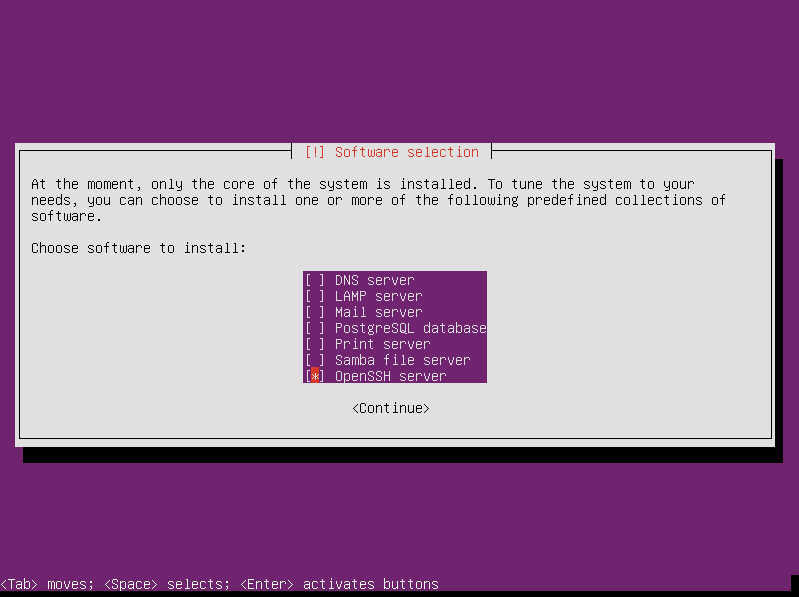
In this window, we will select OpenSSH server only. The reason is that with this option, it will allow us to connect to our home server from other computers in our home network or even from anywhere in the world (after some extra adjustments in the router).
To select OpenSSH server use the down arrow and position the highlighted red square with the OpenSSH server line, then press the Space Bar key from your Keyboard. Once this is done, you should see a * next to OpenSSH server. Press Enter to continue.
Installing Software
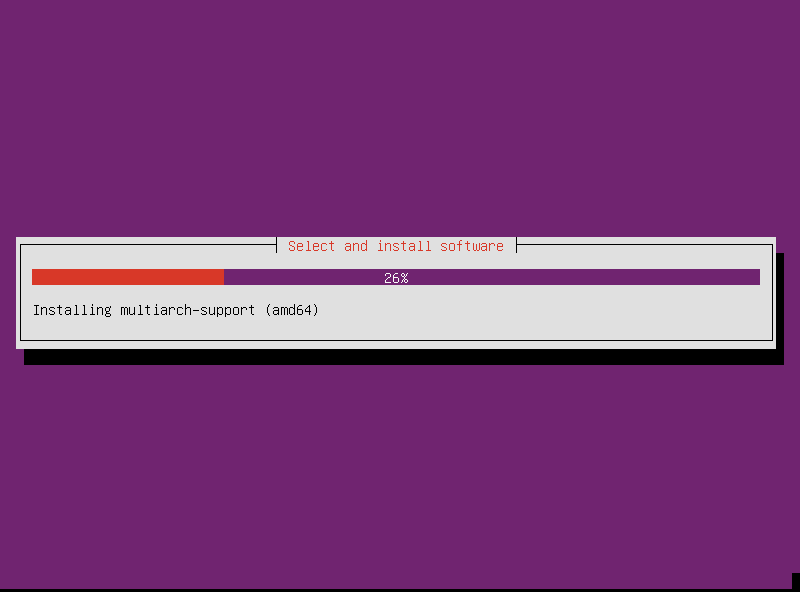
Now, the computer is proceeding to install the software needed in your Ubuntu Home Server. Just sit and wait until you get the next screen.
Grub installer
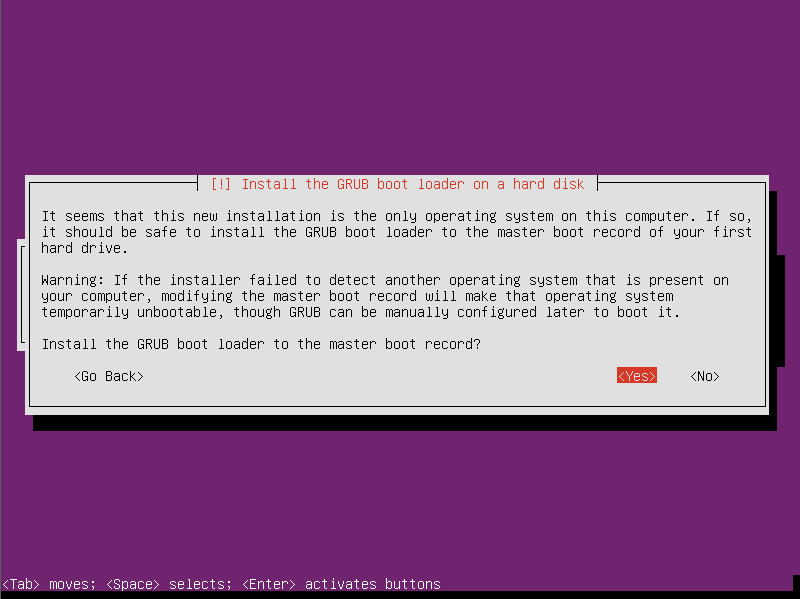
This very important! Make sure to install it by selecting <Yes> and then press Enter. If you don’t install it, your computer most likely will not boot after installation; the only way will be to go back and start all over.
Installation complete
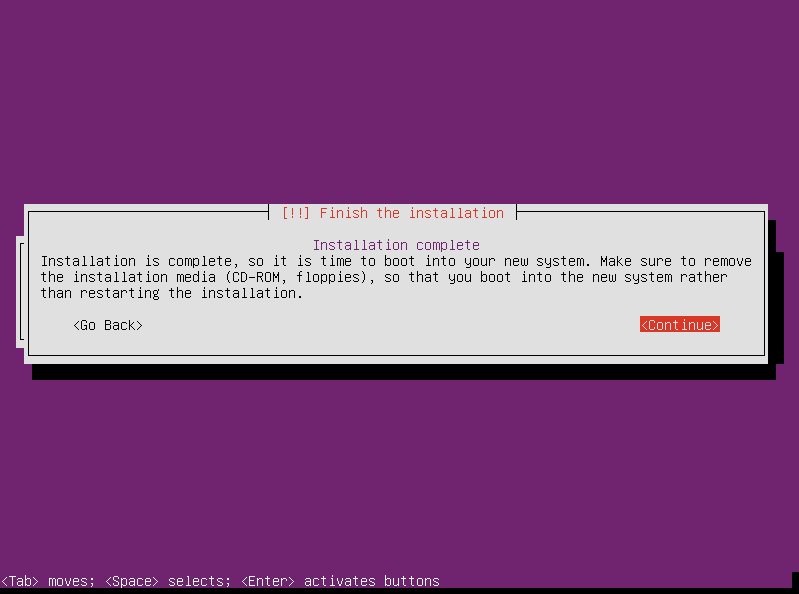
Congratulations! Now you have successfully installed your Ubuntu Home Server using the alternate install.
Now, you can remove your USB drive or your DVD from your computer to continue; once you removed them, press Enter to continue.
Once you press Enter, the computer will reboot and present a lot of messages on your screen; don’t be scared! That is normal, and it is the regular process from now on.
First login
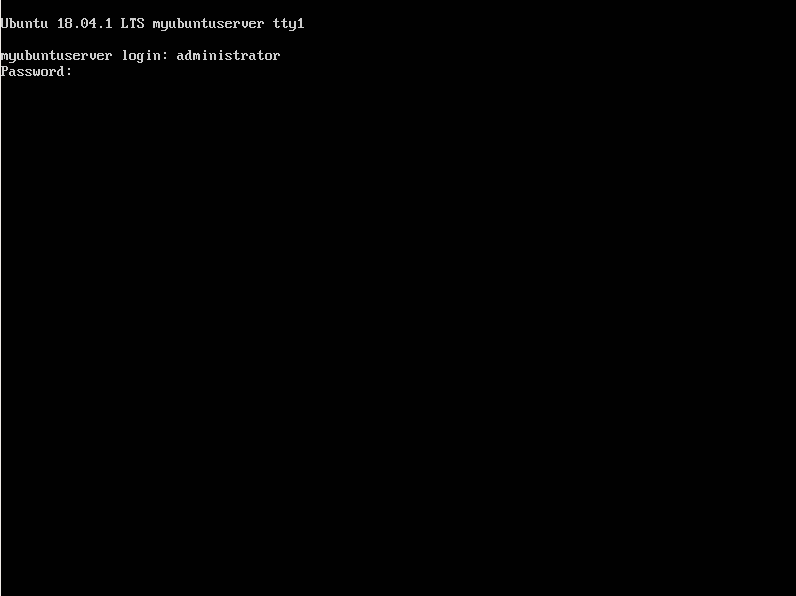
To access your newly installed system, you need to type as follows:
I previously set up my user name to be administrator; so I will type administrator and then press Enter. After that, the system will ask for a password. I previously defined my password to be mysupersecretpassword. So, I will type it and press Enter.
In your case, you probably used a different user name and password, and you probably wrote them in your notebook, please look into your laptop and type it in your terminal.
Congratulations!
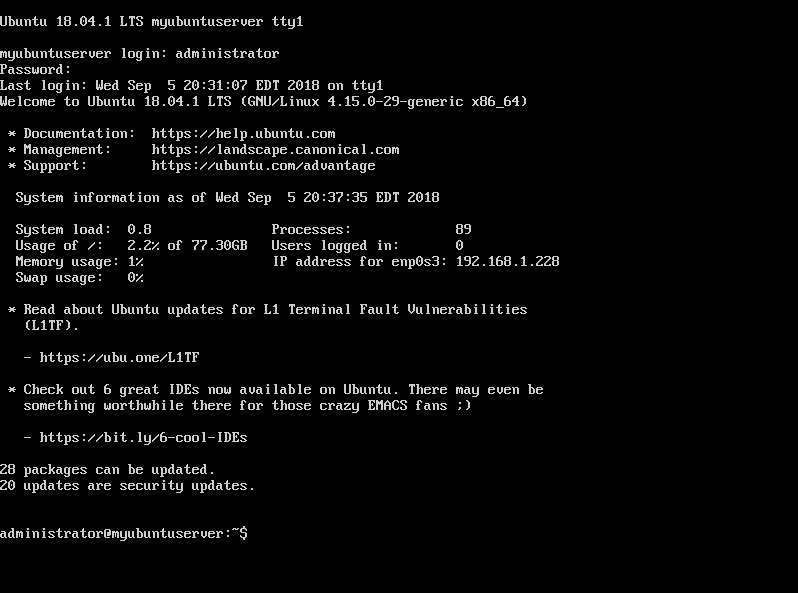
You have successfully installed a bare-bone Ubuntu Server Bionic Beaver 18.04 Long Term Support (LTS) on your PC with SSH support.
Please become familiar with this screen, since this is a confirmation that you are now actually logged in as an active system user; this screen will be the same if you log in from a different computer using putty or ssh from your home network or even anywhere in the world.
This will be our base system from now on.
Next step…
Below, you can find an article that I have put together to achieve the following goal.
Build a state of the art server system
The most important step if you got to this point is to do as follows: